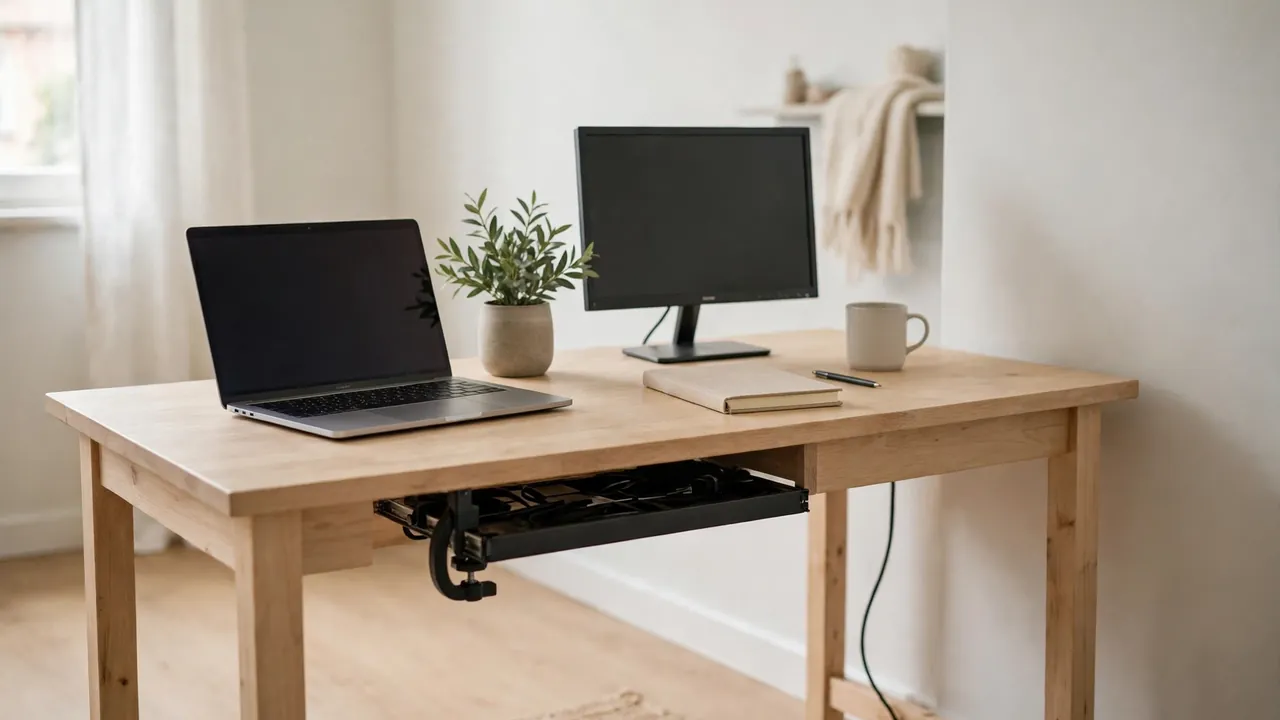
You can hide desk cables in a rented apartment without drilling a single hole. Use a clamp-on or adhesive cable tray under the desk, adhesive clips to guide each cable, a sleeve to bundle the run to the wall, and adhesive trunking along the skirting board.
Rental friendly desk cable management is not the same as ordinary cable management. In your own home, a screw is a minor decision. In a rented flat, the same hole can mean a deduction from your deposit. Every fixing must therefore hold the cables tidily and come away again without leaving a mark.
Start With Your Tenancy Agreement, Not the Cables
Before you stick anything to a desk, wall or skirting board, read your tenancy agreement and the inventory. Most agreements say something about alterations, fixings and damage. Some allow small adhesive fixings. Others forbid any fixings at all.
If the wording is unclear, ask your landlord or letting agent in writing before you start. A short email is enough: describe what you plan to use, where it will go, and that it is removable. Keep the reply. If permission is refused, use a fully freestanding arrangement instead, such as a clamp-on tray, a floor cable cover, or a basket behind the desk leg. Check who owns the desk, too. Fixed wiring and socket work is not a do-it-yourself job; leave that to a qualified electrician.
What You Will Need
You do not need a drill, screws or specialist tools. Buy only what suits your desk, your cables and the layout of your room. It is better to start with a tray and a few clips and add trunking later than to buy everything at once and discover half of it does not fit.
- A clamp-on or adhesive cable tray: the main hiding place. Clamp-on trays use no adhesive, so they are the safest choice for rented furniture.
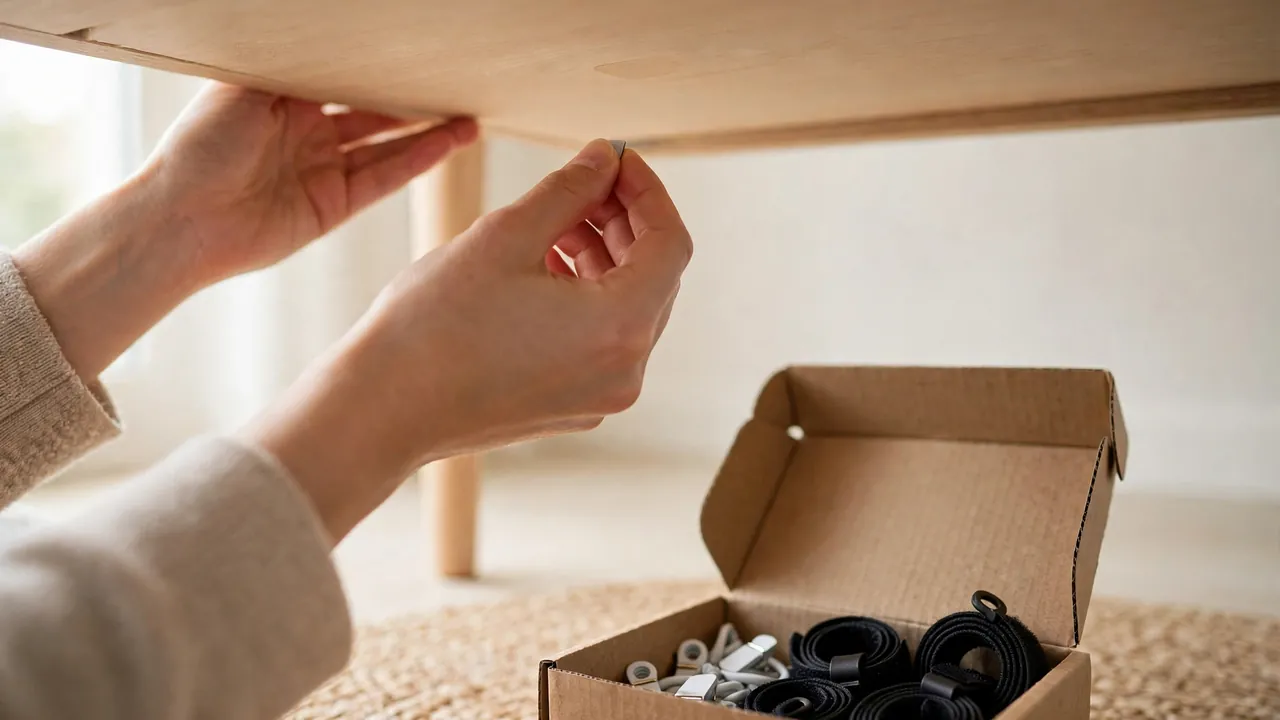
- Adhesive cable clips: small sticky-backed clips that guide individual cables along the underside of the desk.
- A cable sleeve, spiral wrap or split tubing: bundles several cables into one neat run from the desk to the wall.
- Adhesive trunking: a shallow plastic channel that sticks to the skirting board and hides the final run to the socket.
- Reusable hook-and-loop cable ties: for bundling cables without cutting anything, so the bundle can be changed later.
Keep the packaging for every adhesive product you buy. The weight rating, the surfaces it suits, the curing time and the removal instructions are printed there, and they vary between brands.
Step 1: Unplug, Untangle and Count What You Have
Switch everything off and unplug every cable from the wall and from each device. Lay the cables out and follow each one from its plug to its device: monitor, laptop charger, printer, speakers, lamp or phone charger. If several cables look alike, wrap a small piece of coloured tape around each end. Check them for frayed insulation, cracked plugs, bent pins or exposed wires.
Step 2: Choose a Tray That Will Not Damage the Desk
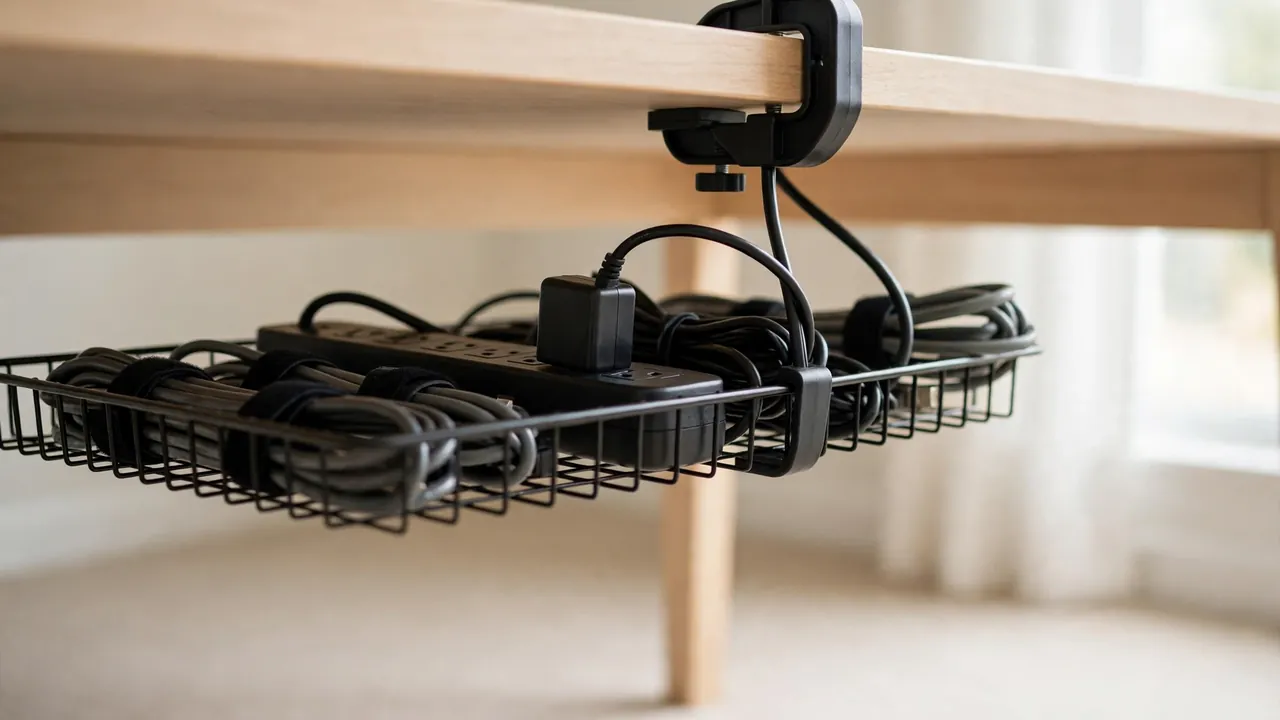
A clamp-on tray grips the back edge of the desk with a clamp or a hook, so nothing is stuck or screwed to the surface at all. This is the safest choice for rented furniture, for desks with a surface that will not take adhesive, and for anyone who wants to move the tray later.
An adhesive tray sticks to the underside with strong double-sided pads or strips. It suits a smooth, sealed wooden or laminate top, and it leaves no holes when removed carefully. A tray holding a power strip and several adapters is much heavier than a tray holding thin data cables alone. Clean the underside first, press the pads firmly, and leave the tray empty for the curing time on the packet, often several hours, before loading it. If the underside is rough, unfinished, waxed or oiled, or if the veneer is loose or flaking, do not use adhesive.
Step 3: Route the Cables Under the Desk
Route each cable from its device to the tray, using adhesive clips to guide individual cables along the underside, close to the back edge and out of the way of your knees, drawers and chair. Space the clips so the cable is supported but not pulled tight, and leave a gentle loop of slack at each end. Slack lets you move a monitor or unplug a charger without dragging the whole bundle.
Step 4: Hide the Drop and the Run to the Wall
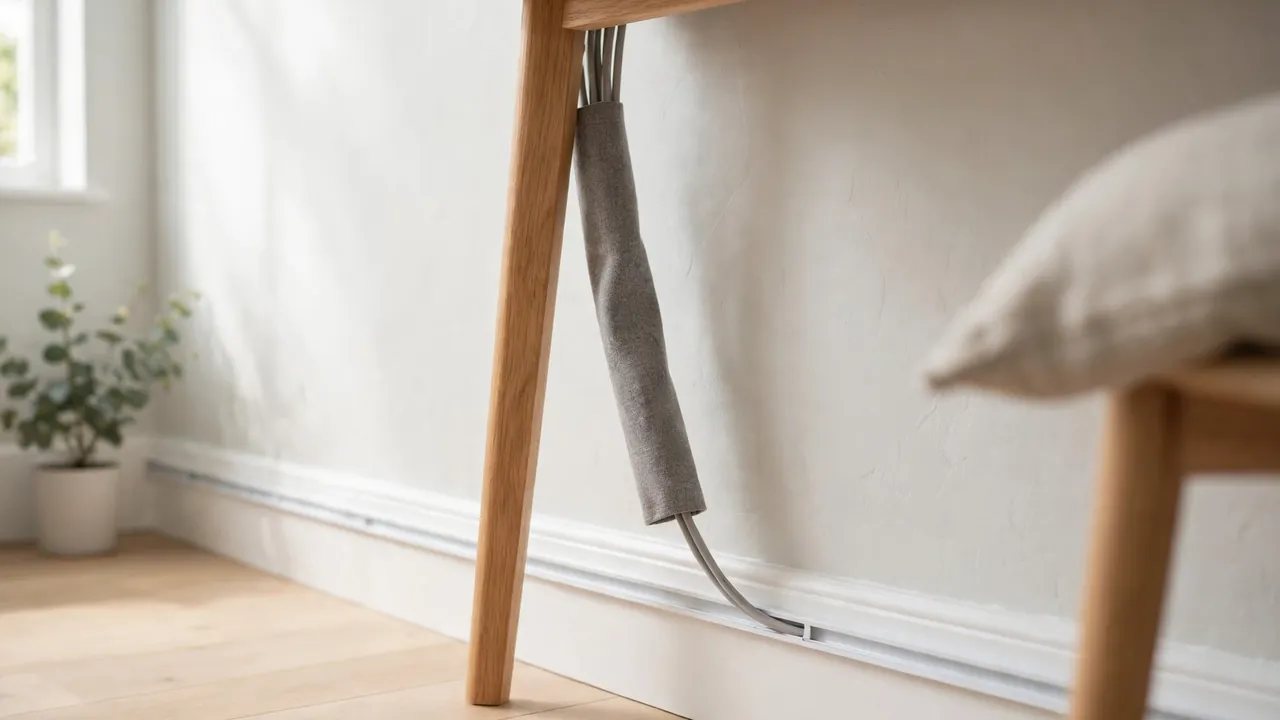
The drop is the short vertical run from the tray to the floor, and it is the part most people can see from across the room. Gather the cables that leave the tray together, slide them into a fabric sleeve, spiral wrap or split tubing, and fasten the top of the sleeve to the back edge of the desk with a clip. Let the sleeve hang straight down behind a desk leg, where it is least visible.
Adhesive trunking is the rental-friendly answer to the last stretch between the desk and the socket. It is a shallow plastic channel, usually with a snap-on lid, that sticks to the skirting board or to the wall just above it. The cables sit inside, the lid closes over them, and the run looks like part of the skirting board. Choose trunking in a colour that matches your skirting board, usually white, and choose a size that holds your cables loosely. Measure the run before you buy, and dry-fit the lengths along the skirting board first, without peeling any adhesive backing, to check the corners.
Step 5: Hide the Power Strip Safely
Put the power strip inside the cable tray, with its switch facing outwards and its sockets facing a direction you can reach. Keep it away from the floor, away from chair legs and away from anything that could spill on it. Leave air around it and around any adapter plugged into it. If an adapter feels hot in normal use, it needs ventilation, not a cover. Never daisy-chain power strips, and never plug one power strip into another to reach a distant socket. Never overload a socket or strip: check the rating on both and keep the load well within it.
Rental Friendly Desk Cable Management for Small Spaces
Use the back of the desk as your main hiding place, not the floor. A tray and a sleeve keep everything off the floor, which matters when floor space is scarce. If the desk has a modesty panel, use the space behind it. If it does not, a sleeve in a dark colour, close to a leg, is less visible than a white sleeve hanging in the middle of the run.
What It Costs
A rental friendly setup does not have to be expensive. The table below gives a rough guide only. Prices vary by brand, size and retailer, and no figure here is a quotation. Check the current price and the weight rating before you buy anything.
| Item | Typical use | Rough cost guide |
|---|---|---|
| Clamp-on cable tray | Main hiding place under the desk | Low to moderate; usually the largest single cost |
| Adhesive cable tray | Alternative where the underside suits adhesive | Low to moderate |
| Adhesive cable clips (pack) | Guiding individual cables | Low |
| Cable sleeve or spiral wrap | Hiding the drop and bundling runs | Low |
| Adhesive trunking (length) | Hiding the run along the skirting board | Low per length |
| Hook-and-loop cable ties (pack) | Bundling and re-bundling cables | Low |
Common Mistakes in Rented Flats
- Sticking adhesive to a dirty or damp surface: dust, grease and polish stop adhesive bonding. Clean the surface, let it dry, and test first.
- Overloading an adhesive tray: check the weight rating on the packet. A power strip plus adapters is heavy; use a clamp-on tray if the load is close to the limit.
- Pulling cables tight: leave slack at every bend and at each device, so moving a monitor does not drag the bundle.
- Hiding a damaged cable: check every cable before you hide it. A frayed cable should be replaced, not concealed.
- Covering a warm adapter: adapters need air. Never wrap one tightly, bury it in a closed box, or cover it with fabric.
- Running cables across a walkway or under a rug: this creates a trip hazard and a crushing hazard, and it hides damage from view.
Troubleshooting
If the tray or clips keep falling down, check the surface first. If the underside is dusty, greasy or damp, clean it and let it dry completely, then refit with fresh adhesive pads. Check the weight, too: remove the heaviest adapters and see whether the tray holds with a lighter load. If it still falls, the surface may not suit adhesive at all, and a clamp-on tray is the better answer. Do not add more adhesive pads to a tray that is already overloaded; the fix is a stronger fixing or a lighter load. If cables are still visible, move the tray closer to the back edge.
Moving Out: Removal and Making Good
Removal is part of the job, not an afterthought, and it should be planned when you fit the fixings, not when the removal van arrives. Keep the packaging, the instructions and any spare adhesive pads. Photograph the setup before you take it down, then work slowly, one fixing at a time.
For adhesive fixings, follow the manufacturer’s removal instructions exactly. In general, peel slowly and steadily, pulling the strip or pad back on itself at a low angle rather than yanking it straight off the surface. Gentle heat from a hairdryer on a low setting can soften some adhesives and make removal easier, but only use heat where the desk finish allows it, and keep the dryer moving so no one spot gets hot. Test on an inconspicuous spot first. Never use solvents, strong cleaners or scrapers to remove adhesive residue unless the manufacturer of the desk, the wall finish or the adhesive says it is safe to do so. Solvents can dissolve varnish, lift veneer, dull gloss paint and stain wood.
Frequently Asked Questions
Can I use adhesive fixings in a rented apartment?
Often yes, but it depends on your tenancy agreement and on the surface. Check the agreement, ask your landlord in writing if you are unsure, and test any adhesive on an inconspicuous spot first. Clamp-on fixings, which use no adhesive at all, are the safest choice where the agreement is strict or the surface is delicate.
Will a cable tray damage my desk?
A clamp-on tray should not, provided the clamp is the right size and is not overtightened. An adhesive tray can damage a finish if it is removed carelessly, or if the finish is loose veneer, wax or fresh paint. Test first on a hidden area.
Rental friendly desk cable management is a matter of choosing fixings that respect someone else’s property as carefully as your own. A clamp-on tray, a few clips, a sleeve and a short run of trunking will hide most of the mess, cost very little, and come away cleanly when you leave.