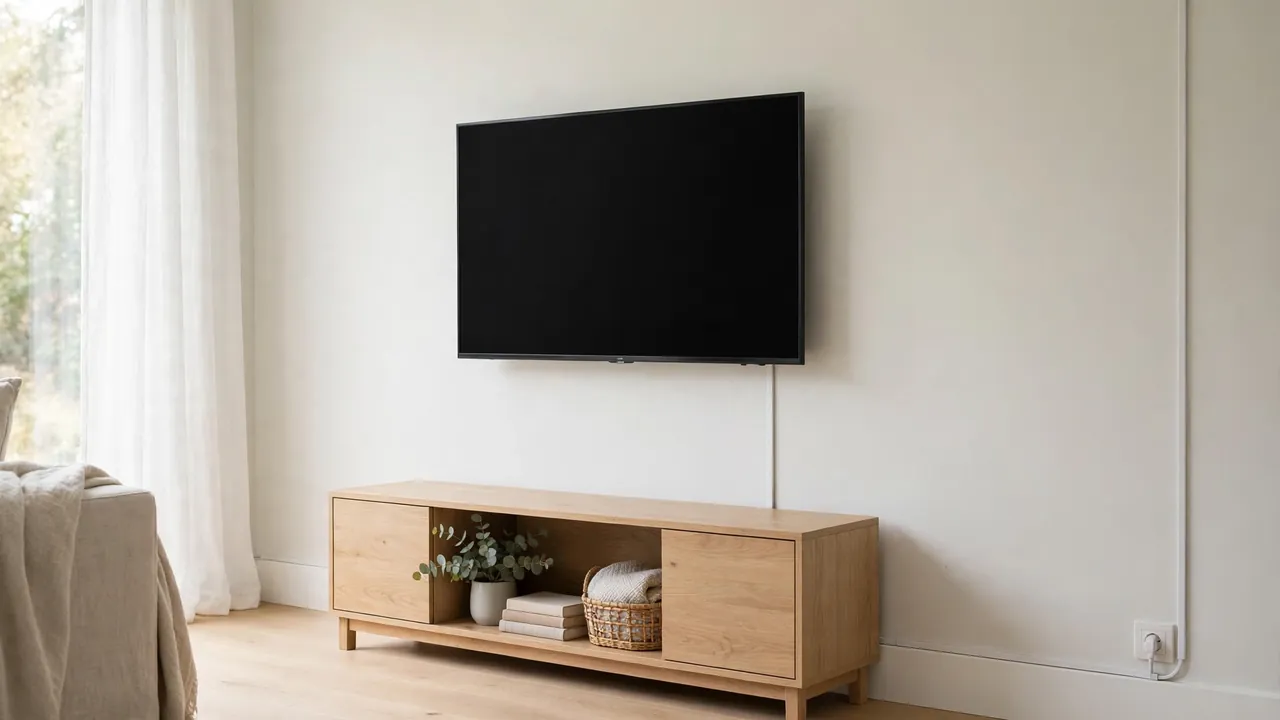
You can hide cables without drilling walls by running them in adhesive-backed trunking along a skirting board, guiding single cables with adhesive clips, or routing them behind furniture to the nearest socket. Paintable trunking blends into the wall, clips hold cables neatly in place, and furniture hides the rest. The result looks tidy, leaves no holes, and can be removed when you move out.
This approach suits rented homes and small rooms where a trailing cable is a trip hazard as well as an eyesore. Plan the route first, match the fixing to your wall surface, and leave slack so cables sit naturally.
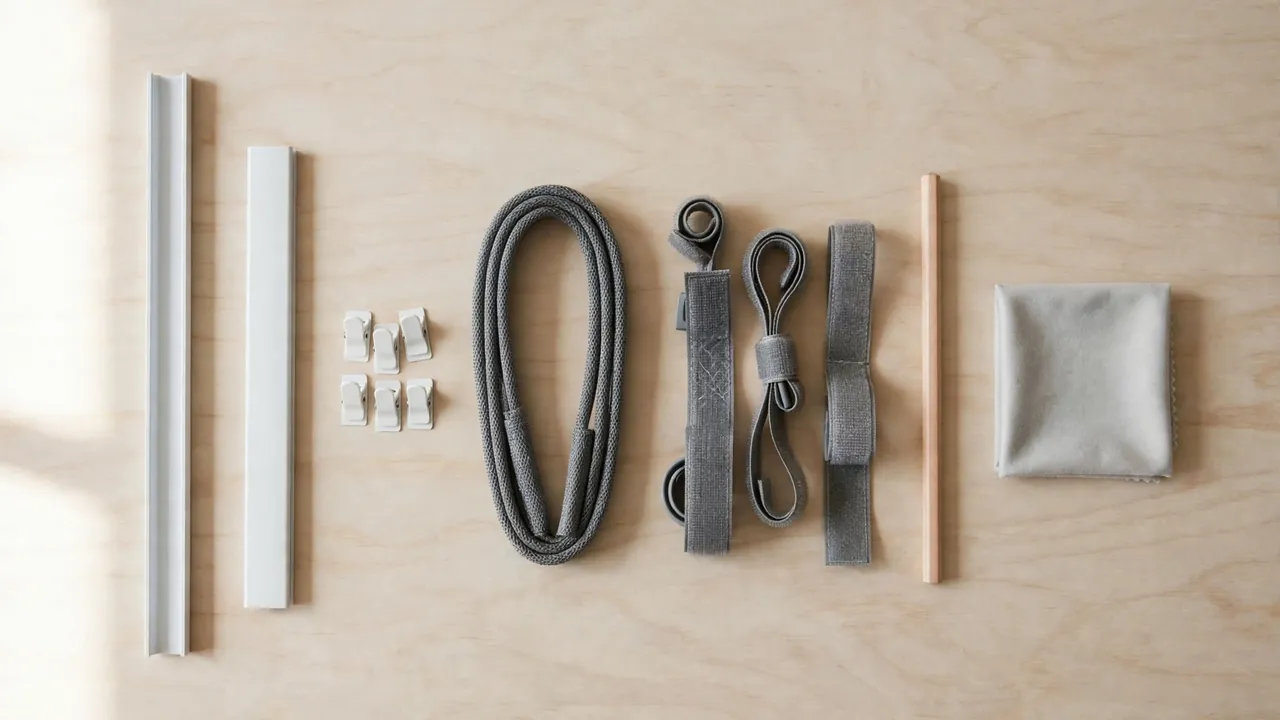
What You Will Need
- Adhesive-backed cable trunking: a slim plastic channel with a clip-on lid. Choose a size that fits your thickest cable with room to spare.
- Adhesive cable clips: small sticky-backed clips that hold one cable each against the wall or skirting board.
- Removable adhesive strips or hooks: command-style strips for holding a cable sleeve or small bundle where a clip will not work.
- A cable sleeve or fabric cover: bundles several cables into one tidy run.
- Reusable hook-and-loop ties: for bundling cables without cutting anything or leaving residue on them.
- A cloth, tape measure, pencil, and spirit level: for cleaning the surface, measuring the run, and keeping it straight.
Keep the packaging for every adhesive product: the weight rating, suitable surfaces, and curing time vary a great deal between brands. A clip made for a thin charging cable will not hold a thick television power cable.
Plan Your Route First
Walk the route each cable must take, from device to socket, and look for the path that hides the most cable with the least fixing. In most rooms that follows a skirting board, runs behind a bookcase or sofa, or drops behind a television stand or desk. A short visible run is fine if it follows a natural line; a long diagonal run across open wall will always look wrong.
Measure the route and add a little extra for slack. Cables pulled tight tug at their sockets and can pull a clip off the wall. Leave a gentle curve at corners and slack at each end.
Do not run cables across a doorway or walkway, or where a chair or vacuum cleaner will catch them. Keep them away from radiators and hot appliances, and never cover a warm power adapter. Leave a way to unplug a cable without pulling the whole run apart.
Step 1: Clean the Surface and Test the Adhesive
Adhesive fixings fail more often because of a dirty surface than a weak product. Dust, grease, and polish stop adhesive pads bonding. Wipe the wall or skirting board with a dry cloth, then with a cloth lightly dampened with a mild cleaner, and let it dry completely.
Smooth, sealed paint and smooth wood or laminate skirting usually take adhesive well. Rough or powdery plaster, flaking paint, textured wallpaper, and fresh paint are much less reliable. Fresh paint needs time to cure fully, so follow the manufacturers’ guidance.
Test in a hidden spot first. Stick one clip behind a piece of furniture, load it with its cable, and leave it for a day. If it holds, fit the full run with confidence.
Step 2: Fit Adhesive Trunking Along the Skirting Board
Adhesive trunking is the neatest no-drill option for a long run, such as from a television to a socket across the room. It hides several cables in a slim channel, and the lid can be removed to add or change a cable.
Measure and cut the trunking to length before you peel any backing off. Mark the line with a pencil and spirit level: trunking looks best tight against the top edge of the skirting board, where the eye expects a line.
Peel the backing off a short section at a time and press the trunking firmly against the wall. Do not load it until the adhesive has had the curing time on the packaging, often several hours — loading too soon is a common reason trunking falls down. Once cured, lay the cables inside loosely and clip the lid on.
Painting trunking so it disappears
Many trunking products are made to be painted, but not all. Check the manufacturer’s guidance, use a paint suited to plastic, and paint before fitting if you can. Let it dry fully, and do not paint over the lid joint so it seals shut.
Step 3: Adhesive Clips and Removable Strips
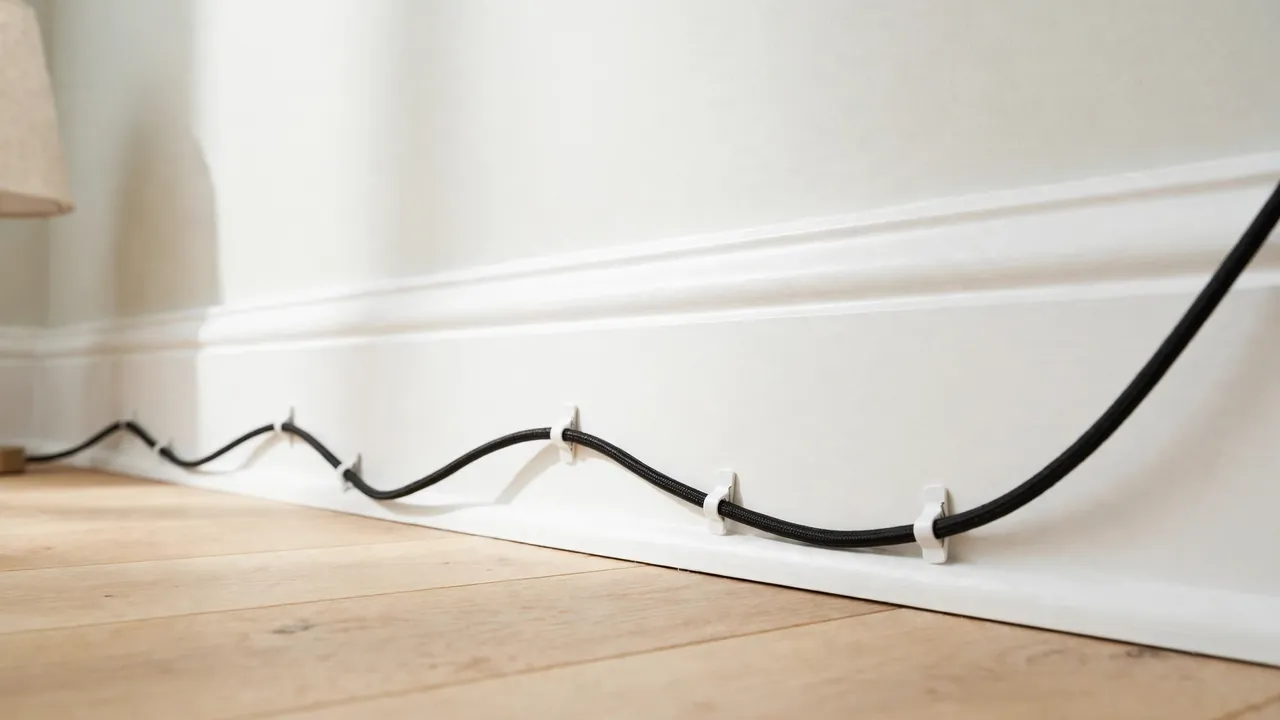
For a single cable — a lamp cable or charger lead to a bedside table — a row of adhesive clips is often tidier than trunking. Space them evenly, closer together for a heavier cable so it does not sag. Press each clip firmly and leave it to cure before loading it.
Removable strips and hooks are useful where a clip will not work, such as holding a cable sleeve against the back of a bookcase. Check the weight rating and stay well within it: a bundle of cables that gets tugged is heavier than it looks.
Wall finish matters with removable strips. On sound paint they usually remove cleanly if you follow the manufacturer’s instructions; on flaking or fresh paint, or soft plaster, they can pull paint away. Test in a hidden spot and pull slowly, close to the wall.
Step 4: Hide Cables Behind Furniture
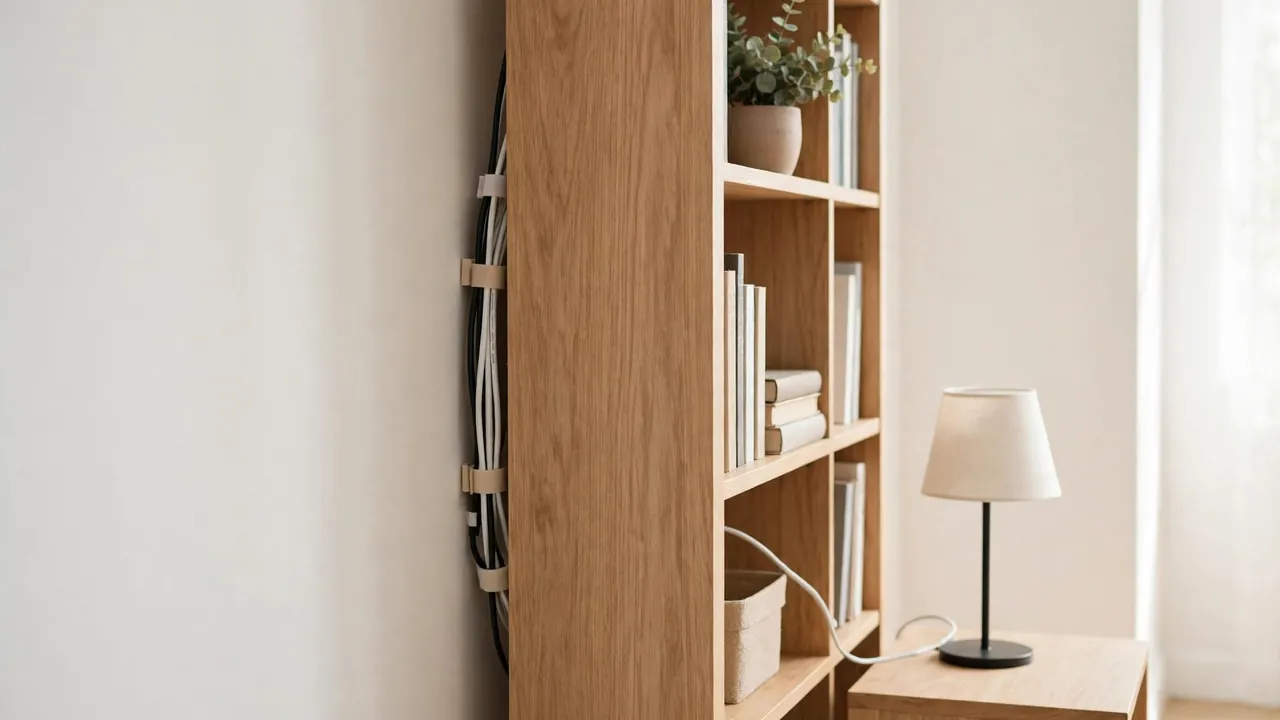
Often the best hiding place is furniture that is already there. A bookcase, sideboard, or sofa a few centimetres from the wall creates a gap cables can run through unseen. Bundle them with hook-and-loop ties and bring each cable out only where it meets its device.
Leave space for air to move and for cables to sit without being pinched. Do not trap a cable under a furniture leg: a crushed cable is a damaged cable and should be replaced, not hidden. Check the gap whenever you move the furniture.
Step 5: Floor-Level Trunking and Cable Sleeves
Some walls will not take adhesive at all, such as rough plaster or textured wallpaper. Take the cable to the floor instead: low-profile floor trunking sits against the skirting board and carries cables across a short stretch. Choose a low, wide profile, place it where people do not normally walk, and never run a loose cable across a walkway.
A fabric sleeve suits a short visible stretch, such as the drop from a television to a media unit. Gather the cables, slide them in, and add a clip or hook at the top so the bundle does not slide down.
Step 6: Suction and Light-Duty Options
Suction hooks and clips work on smooth, non-porous surfaces such as glass or glazed tiles, and remove without residue. They will not hold on paint, plaster, wallpaper, or wood, and can lose grip if the surface gets dusty or damp. Use them only for light cables.
Removing Adhesive Fixings Without Damaging the Wall
Removal is where most wall damage happens. Most removable strips are designed to be pulled slowly in a specific direction, usually downwards and close to the wall, so the adhesive stretches and releases rather than tearing the paint. Pulling outwards, or pulling quickly, is what lifts paint.
For adhesive trunking, warm the adhesive gently with a hairdryer on a low setting, then peel it away slowly in short sections, supporting the wall with your other hand. Remove residue with a cleaner suited to the surface, tested in a hidden spot first.
When Drilling Is the Right Call
No-drill methods cover most rented and small-space situations, but not everything. Cables that must pass through a wall, be chased into it, or connect to fixed wiring are not a no-drill job: leave that work to a qualified person, and ask your landlord first in a rented home.
Ask your landlord before drilling, even for a small hole: many tenancy agreements require permission. A short message explaining what you want to fit, where, and how you will repair it is far better than a hole discovered at the end of a tenancy.
Common Mistakes to Avoid
- Sticking fixings to a dirty or damp surface: dust and moisture stop adhesive bonding, and the fixing will fail.
- Loading adhesive before it has cured: most adhesives need several hours to reach full strength.
- Overloading clips and strips: check the weight rating and stay well within it.
- Running cables across walkways: this creates a trip hazard, however neat the cover looks.
- Covering a warm power adapter: never enclose one in a sealed box or tight sleeve with no airflow.
- Daisy-chaining power strips: never plug one power strip into another. If you need more sockets, speak to a qualified electrician.
Troubleshooting
| Problem | Likely cause | What to do |
|---|---|---|
| Trunking keeps falling down | Dirty surface or loading before curing | Clean and dry the surface, refit, and leave it to cure empty |
| Clips peel off the wall | Wrong surface, or the cable is too heavy | Test on a hidden spot, use more clips, or switch to trunking |
| Paint lifts on removal | Flaking paint, or pulling too fast | Warm the adhesive, peel slowly close to the wall |
| Cable sags between clips | Clips spaced too far apart | Add more clips, or move the cable into a sleeve |
Cost-Conscious Alternatives
Start with the cheapest fix that solves the worst cable: routing behind furniture and bundling with hook-and-loop ties costs almost nothing. Adhesive clips are usually the cheapest bought fixing; a sleeve hides several cables at once and can be reused. Trunking costs more but gives the neatest finish — measure first, as one long length cut to fit is usually cheaper than several short lengths.
Frequently Asked Questions
Can I hide cables without drilling walls in a rented flat?
Yes. Adhesive trunking, clips, removable strips, sleeves, and routing behind furniture all suit rented homes. Check your tenancy agreement first and test any adhesive in a hidden spot.
Will adhesive trunking damage the paint when I remove it?
It can, especially on flaking or fresh paint, or soft plaster. The risk is lower on sound paint if you follow the manufacturer’s removal instructions, warm the adhesive gently, and peel slowly close to the wall.
What is the best way to hide television cables without drilling?
Run them in a short length of paintable trunking from the television to the media unit, or in a fabric sleeve if the drop is short. Keep the run vertical, tight to the wall, and leave slack at each end.
What should I do if adhesive will not stick to my wall?
Clean the surface, try a different adhesive product, or change the route. Rough plaster and textured wallpaper often will not take adhesive reliably, so use floor-level trunking or route behind furniture instead.
Start with the route, not the product. Walk the path from each device to its socket, choose the line that follows the skirting board or hides behind furniture, and fit one short run first. A tidy, no-drill setup is a planned route, a clean surface, fixings that suit the wall, and cables with enough slack to sit naturally.