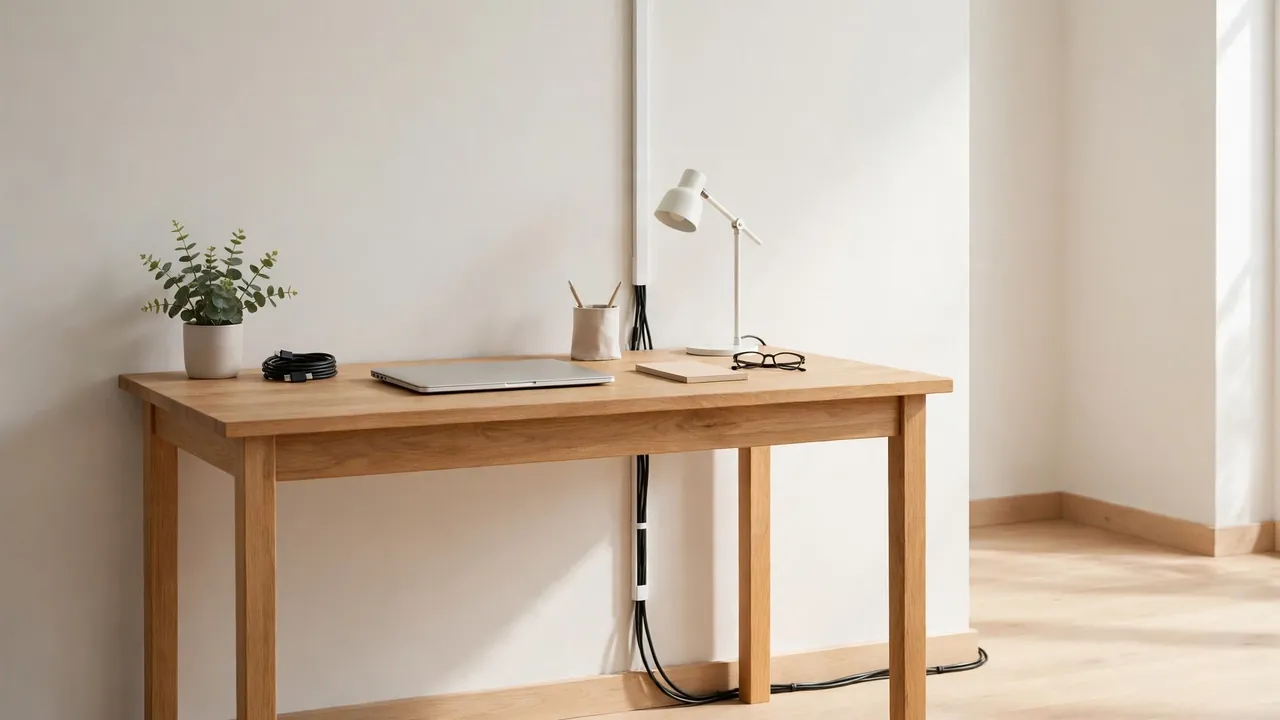
For desk against wall cable management, leave a small gap between the desk and the wall, run cables along the wall or skirting board in adhesive clips or slim trunking, and bring them up to the desk in one tidy vertical drop. Put the power strip where you can reach its switch without moving the desk, and never trap a cable between the desk and the wall.
A desk pushed hard against a wall looks tidy from the front, but it hides the worst place for cables to live. Anything that slips behind it drops into a narrow gap where you cannot see it, reach it, or unplug it without dragging the whole desk out.
Why a Desk Against a Wall Is Different
A freestanding desk lets you walk around the back and lift a plug out in seconds. A desk against a wall does not.
The wall also changes what is possible. You have a flat vertical surface running the full width of the desk, and that surface can carry the cables for you. Adhesive clips, slim trunking, and a channel on the skirting board all use the wall as a support.
Before You Start: Plan the Route
Do not start by sticking clips to the wall. Pull the desk out a little, switch everything off, and look at what is actually there.
- List every device and cable. Monitor, laptop charger, docking station, lamp, speakers, phone charger, printer — note where each one starts and ends.
- Find your sockets. Note where they sit in relation to the desk: behind it, to one side, or at skirting-board level.
- Choose one main drop point. Pick a single place where cables travel down to power — usually at one end of the desk, near a back leg, close to the sockets.
- Set the gap. Leave a gap wide enough to pass a hand and a cable through comfortably — roughly the width of two or three fingers.
- Check the surfaces. Adhesive clips hold well on smooth painted plaster and flat skirting boards, and poorly on textured wallpaper, flaking paint, and dusty surfaces. Check the manufacturer’s weight rating.
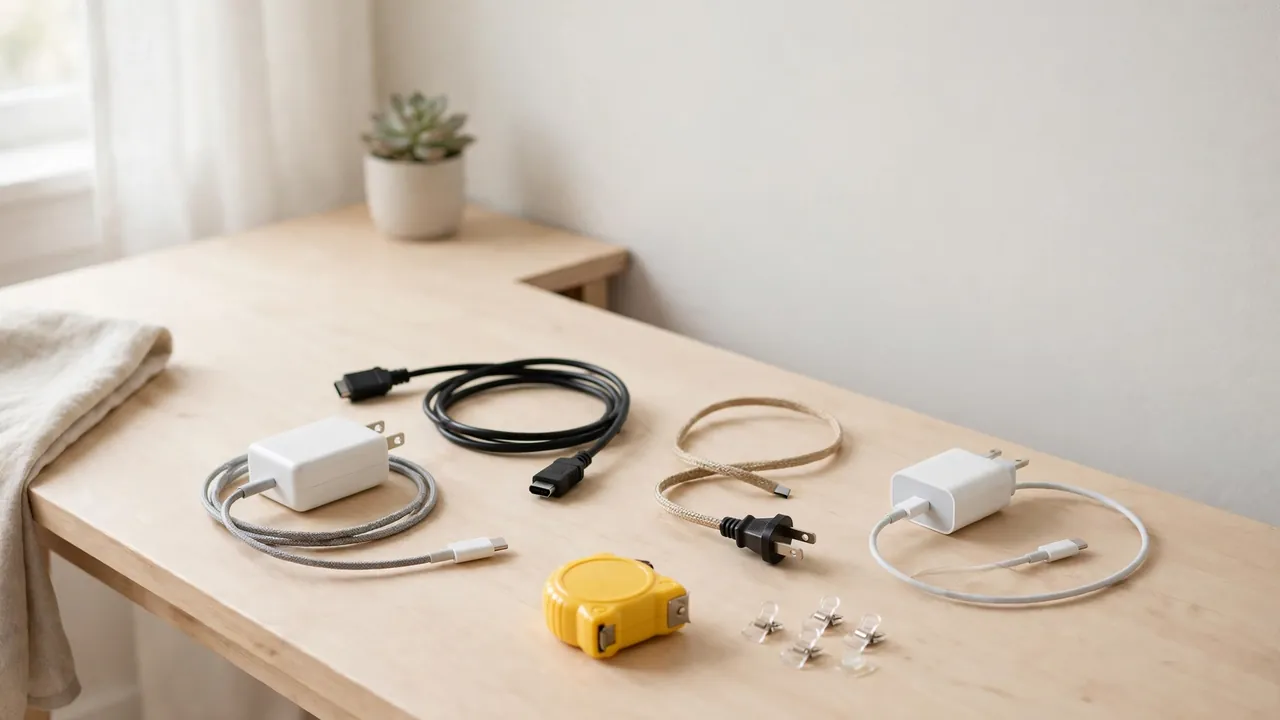
What You Will Need
| Item | What it does | Low-cost alternative |
|---|---|---|
| Adhesive cable clips | Hold cables along the wall or skirting board | Small adhesive hooks |
| Slim self-adhesive trunking | Covers a run of cables on the wall | A fabric cable sleeve |
| Under-desk cable tray | Holds the power strip and spare length | A sturdy basket on adhesive hooks |
| Reusable hook-and-loop ties | Bundle cables loosely without pinching | Twist ties from packaging |
| Shorter cables | Remove spare length that falls behind the desk | Coil spare length in the tray |
| Extension lead with a switch | Brings a reachable switch to the desk side | The wall socket switch, if reachable |
Step-by-Step: Desk Against Wall Cable Management
Step 1: Pull the desk out and switch everything off
Move the desk away from the wall far enough to work behind it, and clear the floor. Switch off and unplug every device first, and inspect each cable for fraying, kinks, or a loose plug.
Step 2: Decide where the power will live
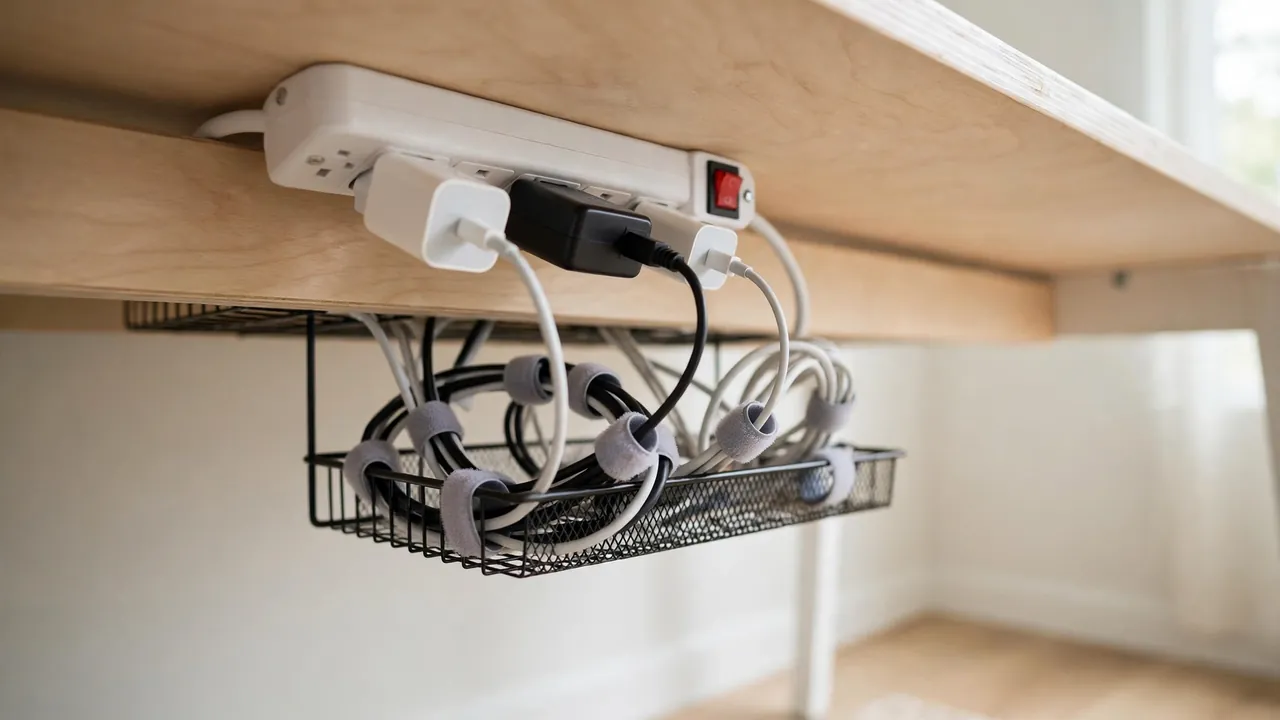
The power strip should sit where you can see it, reach its switch, and unplug one device without moving furniture — usually in an under-desk tray near the front edge, or fixed to the side of the desk. Never daisy-chain one extension lead into another, and never overload a socket or a strip.
Step 3: Set the gap and mark the drop point
Push the desk back to its working position, leaving that small hand-width gap to the wall. Mark the drop point with removable tape. Everything that needs power should travel to this point before it drops down. With a solid desk back, the drop may run down a back leg instead.
Step 4: Run the horizontal route under the desktop
Run each cable towards the drop point along the underside of the desktop, not across the open space behind the desk. Use the tray to carry the run and store spare length loosely inside it.
Step 5: Bring cables down the wall in one drop
From the tray or the back edge, bring the cables down in a single bundle to the power strip or socket. Fix clips or a slim channel to the wall or skirting board, spaced closely enough that cables do not sag between them. Never pull a cable taut.
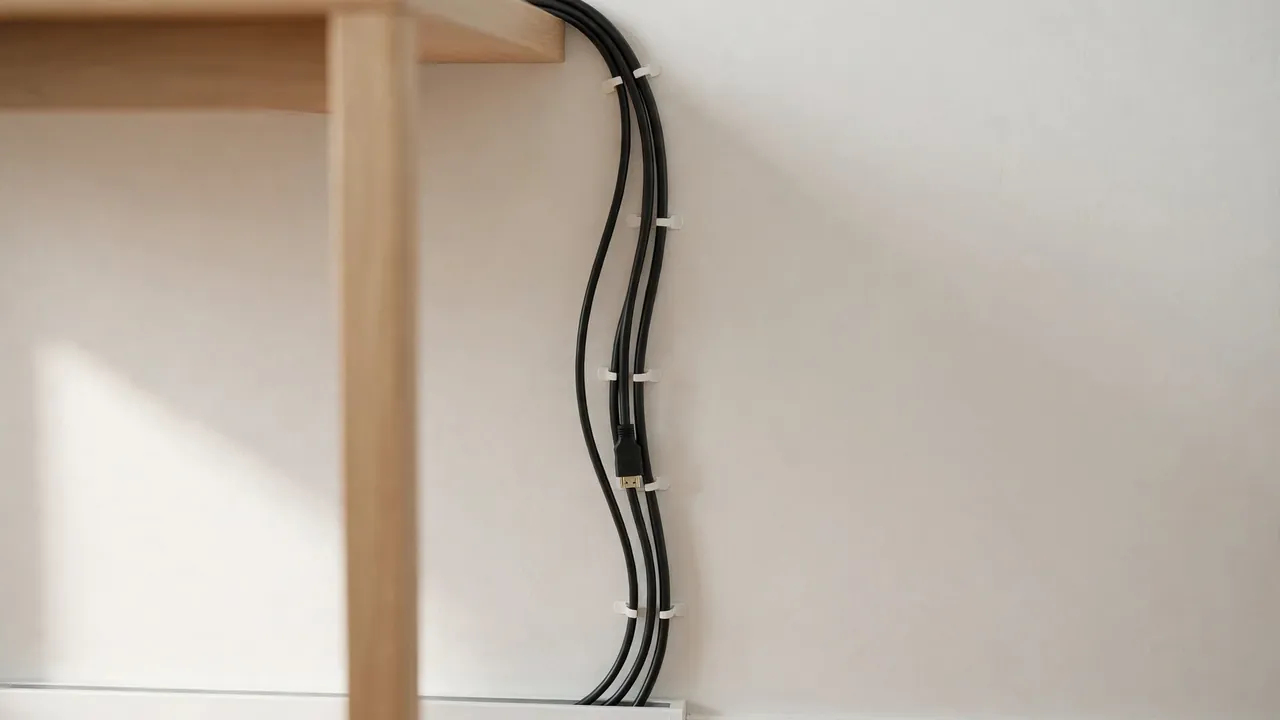
Step 6: Route along the skirting board to the socket
If the socket is not directly below the drop point, run the final stretch along the skirting board rather than diagonally across the floor behind the desk. Clips or slim trunking keep the cable flat, visible, and clear of desk legs and chair castors.
Step 7: Test everything before you push the desk back
Plug everything in, switch it on, and check that each device works. Is every plug fully in, is each adapter supported, is any cable pulled tight? Then push the desk back slowly, watching the gap.
Monitor Cables: Let Them Drop Straight Down
Monitor cables cause more trouble behind a wall desk than any other cable, because the monitor sits at the back of the desk and its cables naturally fall straight into the gap. Run the power and video cables down the wall directly behind the monitor, in clips or a short length of trunking, to the tray or power strip below.
Keeping Plugs and Switches Reachable
The most common mistake with a desk against a wall is putting the power strip on the floor behind the desk, where the only way to switch it off is to reach blindly into the gap or drag the desk out. The switch you use every day should be reachable from your chair without moving furniture.
Mount the strip under the desktop near the front or side edge, or fix it to the wall where you can reach around the side of the desk. Keep the strip off the floor, keep its cable short and supported, and leave space around it for air. Never cover a power strip or a warm adapter.
Airflow, Dust, and Cleaning Behind the Desk
The gap behind a wall desk is a dust trap, and dust around plugs and adapters is not something to ignore. The small gap you left lets air move, lets you see what is there, and lets you clean. Once a month, pull the desk out a few centimetres and clear the dust from the skirting board, the plugs, and the tray. Switch devices off first.
Moving the Desk Out Safely
Sooner or later you will need to move the desk — to clean, to redecorate, or to add a device. Switch off and unplug what you can reach, or switch off the power strip, before the desk moves.
Cost-Conscious Alternatives
A tidy wall-desk setup does not need to be expensive. Start with the tray and the clips, add trunking only if you want a fully covered finish, and spend any remaining budget on shorter cables for the worst offenders.
Common Mistakes to Avoid
- Pushing the desk flush to the wall. No gap means no access, no airflow, and a cable crushed every time the desk shifts.
- Letting cables hang free behind the desk. An unsupported cable drops, snags, and pulls on its plug.
- Hiding the power strip on the floor behind the desk. You cannot reach it, see it, or switch it off quickly.
- Running cables diagonally across the gap. A diagonal run is hard to trace and the first thing to get trapped when the desk moves.
- Pulling cables taut. A taut cable strains its plug and socket; leave a gentle curve at every bend.
- Overloading one socket or strip. Do not daisy-chain extension leads, and check the manufacturer’s guidance for high-draw devices such as heaters.
- Covering warm adapters. Tucking an adapter under fabric or into a closed container traps heat.
- Using the wrong fixing for the wall. Adhesive on dusty, textured, or flaking surfaces will fail, and a falling clip takes the cables with it.
Troubleshooting
| Problem | Likely cause | Fix |
|---|---|---|
| Cables keep falling behind the desk | No support between the desktop and the floor | Add clips or a channel on the wall for the drop |
| A plug keeps working loose | Cable weight or tension pulling on it | Support the cable and adapter; add slack at the plug |
| Adhesive clips keep coming off | Dusty or textured surface, or clips overloaded | Clean the surface; use fewer cables per clip |
| You cannot reach the power switch | Strip is on the floor behind the desk | Move the strip under the desktop or to the desk side |
| The desk will not sit straight | A cable or plug is trapped behind it | Pull the desk out, re-route the cable, reset the gap |
| A cable is warm to the touch | Overload, damage, or trapped heat | Switch off and unplug; check the manufacturer’s guidance |
Frequently Asked Questions
How big should the gap between the desk and the wall be?
Big enough to pass your hand and a cable through comfortably — roughly the width of two or three fingers is a practical guide, not a rule.
Is it safe to run cables down the wall behind a desk?
Yes, if they are supported in clips or trunking, not pinched between the desk and the wall, not run where they can be crushed, and not overloaded. Keep plugs where you can see and reach them. For fixed wiring work, speak to a qualified electrician.
What is the best way to hide cables on a desk against a wall in a rented home?
Use removable fixings: adhesive clips or trunking on the wall or skirting board, and an under-desk tray fixed with adhesive or clamps rather than screws. Check the adhesive weight rating and clean the surface first.
Where should the power strip go on a desk against a wall?
Under the desktop near the front or side edge, or fixed to the wall where you can reach its switch from your chair. Avoid the floor behind the desk. Keep it off the floor and do not cover it.
Final Checklist
- A small gap is left between the desk and the wall, and it stays clear.
- Every cable has one planned route: along the desktop, down the wall or a leg, and along the skirting board to the socket.
- The power strip is mounted where its switch is reachable from your chair.
- Plugs and adapters are supported, not hanging, and nothing is trapped between the desk and the wall.
- No extension lead is plugged into another, and no socket or strip is overloaded.
- Warm adapters have air around them and are not covered.
- You can trace any cable from device to socket, and pull the desk out without dragging the cables with it.
Desk against wall cable management is mostly a matter of respecting the gap: use the wall to carry the cables, keep the power where you can reach it.