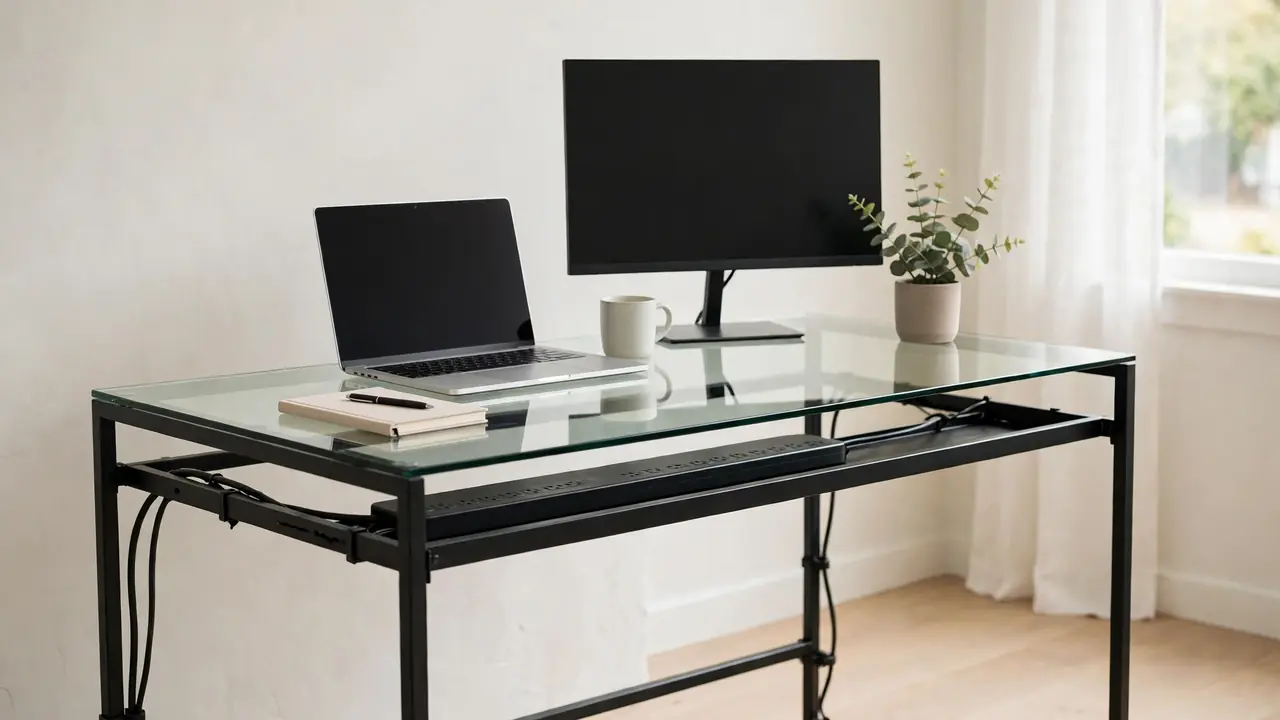
Good cable management glass desk setups start with one honest fact: you cannot hide cables behind the desk surface, because there is no solid surface to hide them behind. The best approach is to gather every cable into an opaque tray or sleeve, fix that tray to the metal frame rather than to the glass, and route cables tightly along the legs and frame so almost nothing hangs in open view.
This guide covers the methods that work, the ones that usually fail, and how to plan a setup that stays tidy when you add a device. It assumes a typical home-office glass desk: a tempered glass top on a metal frame, with a monitor, a laptop, a charger, and a power strip.
Why Glass Desks Need a Different Approach
On a wooden desk, an under-desk tray is invisible from above — the solid top does most of the hiding. On a glass desk, the top is transparent, so anything fixed underneath is on display from above, from the side, and often from across the room. A clear tray, loose black cables, and a white power strip are all visible at once.
That changes three decisions. First, the container matters more than the cables inside it: an opaque tray or fabric sleeve hides a mess, while a clear one frames it. Second, glass is a poor surface for screws, drilling, and many adhesives, so the metal frame and legs become the structure you work with. Third, colour matters: a cable that blends into a dark frame disappears, while the same cable crossing clear glass draws the eye. Do not drill a cable hole through a glass top. Tempered glass can shatter if drilled or stressed at a hole or edge, and modification is likely to void a warranty.
Plan Before You Buy Anything
List every cable and its route: each device, what it plugs into, and where the cable needs to go — typically monitor power and video cables, a laptop charger, a phone charger, and a desk lamp. That list tells you how many cables must reach the power strip and where the main bundle will run.
Then decide where the power strip will live. On a glass desk it is the most visible item, so its position decides the layout. The usual best spot is inside an opaque tray fixed to the frame, or in a cable box on the floor behind a leg. Avoid leaving it loose on the floor, where it becomes a trip hazard, or where a chair wheel can roll over its cables.
Measure the frame, not just the top: the depth of the crossbars, the distance between them, and the width available for a tray. Many trays are designed to screw into wood; on a glass desk you need one that can clamp, hook, or screw into a metal bar, or be fixed with cable ties to the frame. Also check cable lengths: excess cable is the main cause of visible bulk under glass. Coil spare length inside the tray, never tightly around a hot adapter.
Choose one main hiding place — usually a single opaque tray under the back edge, fixed to the frame. All cables run to that tray, the power strip sits inside it, and a single lead runs to the wall socket. Splitting cables between small holders usually looks busier, because each creates its own visible cluster.
Cable Management Glass Desk Methods That Work Best
1. An opaque under-desk tray fixed to the frame
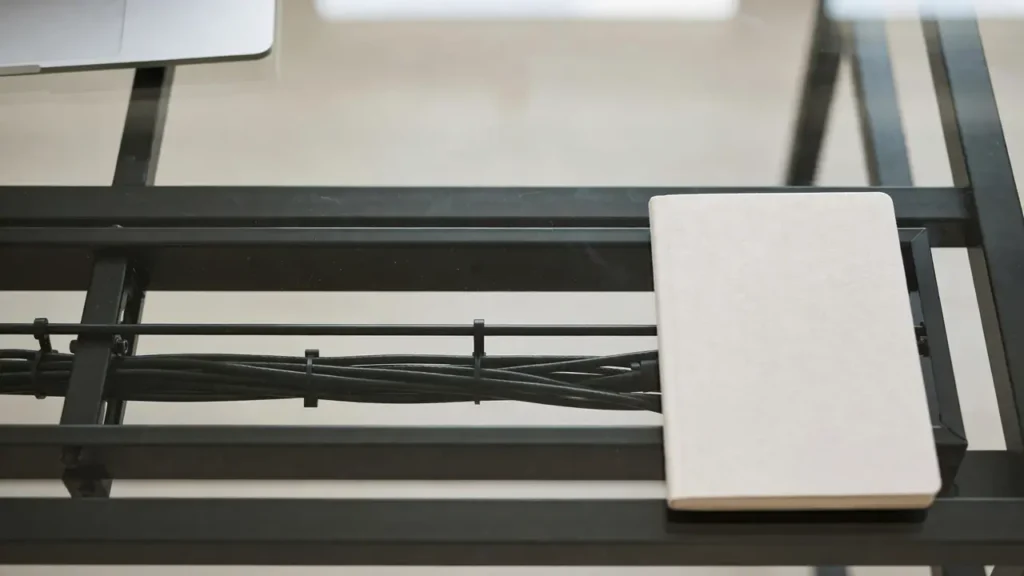
This is the workhorse solution for cable management glass desk setups. A solid metal or opaque plastic tray, fixed to the frame under the back of the desk, holds the power strip and the slack of every cable. From above you see the tray, not the cables. Choose a solid base and sides rather than an open wire basket, which leaves contents visible from below and the side.
If your frame has pre-drilled holes, use those with suitable screws or bolts, following the manufacturer’s instructions. If not, look for a tray that clamps onto a bar, or fix it with strong cable ties looped around the frame — neat and reversible if ties are tight and cut ends are trimmed flush. Some trays use high-strength adhesive pads, but check the weight rating first: adhesive that holds on painted metal may hold poorly on glass or a powder-coated finish.
2. Cable sleeves
A fabric sleeve gathers several cables into one soft tube, much less noticeable than the same cables running separately. It works well for the run from the tray to a monitor or laptop, and for the drop to the floor. Choose a colour matching the frame — usually black, dark grey, or white. Sleeves do not hide a power strip, so they complement a tray rather than replacing it. Label the ends if you often unplug devices.
3. Routing along the frame and legs
Run cables tight against a crossbar or along the inside face of a leg, fixing them with adhesive clips, hook-and-loop ties, or cable ties at intervals. A cable following a straight metal edge reads as part of the desk; the same cable hanging in a curve across open glass reads as clutter. Avoid diagonal runs and sagging: if a run is longer than about 30 centimetres without support, add another clip in the middle. Leave a little slack at each end, but take up the rest inside the tray.
4. A cable spine for the floor run
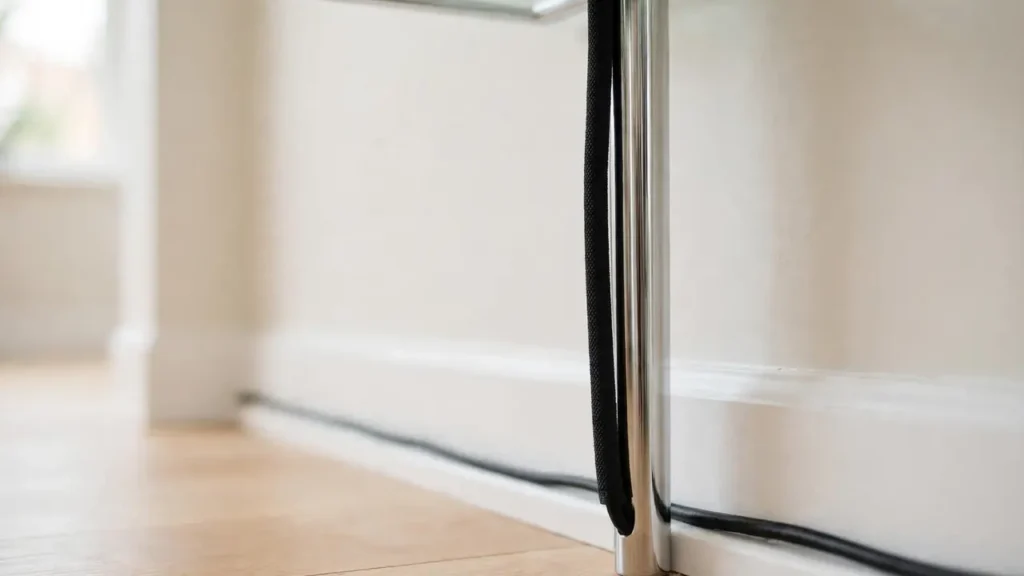
The run from desk to floor is often the most visible part, because it crosses open space. A cable spine — a flexible segmented tube — or a fabric sleeve clipped to a leg turns it into a single neat column. Fix the top beside the tray, let it drop straight down behind a leg, then run the power lead along the skirting board to the socket. Keep it clear of walkways and chair wheels, and never under a rug, where a cable can overheat unseen.
What Usually Does Not Work on Glass
Adhesive clips can work on painted metal but are unreliable on glass, which is smooth and non-porous. Many adhesives do not bond well, and heat from sunlight can weaken a bond over time. If you use adhesive fixings at all, use them on the frame, not the glass, and choose a product whose weight rating comfortably exceeds the load. Suction cups are also a poor choice: they hold best on perfectly clean, flat glass and lose grip with dust, temperature changes, and vibration. A cup that releases overnight can drop a bundle onto the floor, and they are usually too small for more than one or two light cables.
Clear trays, sleeves, and clips are marketed as discreet, but under a glass desk they put contents on display while adding their own reflections. An opaque tray will almost always look tidier. Finally, do not drill the glass top, screw into it, or clamp a heavy fitting onto its edge. Tempered glass is strong as a flat sheet, not at a drilled hole or clamp point, and even a small chip at an edge can weaken it.
Power Strips, Adapters, and Safety
Never daisy-chain power strips — never plug one strip into another to gain extra sockets. Each strip should plug directly into a wall socket, and the total load should stay within the strip’s and socket’s ratings. If you need more sockets, use a strip with more outlets, or ask an electrician about adding a socket. Never cover a power strip or a hot adapter with fabric, paper, or an enclosed box that traps heat. Adapters need air to cool, and a tray should have ventilation gaps and not be packed so tightly that adapters press together.
Keep cables away from places where they can be crushed: under desk feet, under a chair wheel, or in a drawer that closes on them. Check for damage where a cable bends sharply or rubs a metal edge. A cable with a frayed sheath, exposed wires, or a cracked plug should be replaced, not taped over. Fixed wiring, such as adding a socket inside a desk, is work for a qualified electrician.
Choosing Colours That Disappear
Match the tray, sleeve, and clips to the frame colour: black on a black frame, white on a white frame. Avoid mixing several colours, as the mix itself draws attention. Use a sleeve to unify a mixed bundle: one dark sleeve holding a black monitor cable, a white charger, and a grey audio cable looks like one intentional run. Avoid bright cable ties, trim tie ends flush, and prefer matte finishes, which catch fewer reflections.
Step-by-Step: Tidy a Glass Desk in About an Hour
- Unplug and untangle. Switch off, unplug everything, and remove cables you no longer use.
- Fit the tray first. Fix the opaque tray to the frame under the back edge, level and secure.
- Place the power strip. Put it inside the tray, sockets facing up, with space around each adapter.
- Route cables to the tray. Run each cable along the frame, avoiding diagonals across the glass.
- Coil spare length inside the tray. Coil excess loosely, not tightly around an adapter.
- Sleeve the visible runs. Cover the bundle to the monitor and the drop to the floor.
- Do the floor run last. Drop the lead behind the leg nearest the socket, along the skirting board.
- Test and adjust. Plug in, check each device, then view the desk from across the room.

Common Mistakes to Avoid
- Clear tray: it displays the mess instead of hiding it. Choose opaque.
- Fixing things to the glass: adhesives and suction cups are unreliable there, and drilling is unsafe.
- Overfilling the tray: packed adapters trap heat and are hard to unplug. Leave air gaps.
- Long diagonal runs: cables crossing the glass in a curve are the most visible fault.
- Ties too tight: over-tightening can damage a cable sheath. Prefer hook-and-loop ties.
- Forgetting the floor run: a loose cable across the floor is untidy and a trip hazard.
- Buying before measuring: a tray too deep can foul the glass; one too narrow will not hold the strip.
Troubleshooting
Tray slipping, or cables sagging
If an adhesive fixing fails, clean the surface or switch to a clamp or cable-tie fixing on the frame, and reduce the load if the tray holds more than its rating. For sagging, add fixing points every 20 to 30 centimetres and take up spare length in the tray. If the setup looks tidy from the front but messy from above, check for cables running across the glass.
Frequently Asked Questions
Can I use a normal under-desk tray on a glass desk?
Yes, if you choose an opaque tray and fix it to the metal frame rather than to the glass. Check dimensions first, and do not drill the glass.
A glass desk rewards a simple plan: one opaque hiding place on the frame, straight runs along the metal, a neat drop to the floor, and nothing fixed to the glass itself.