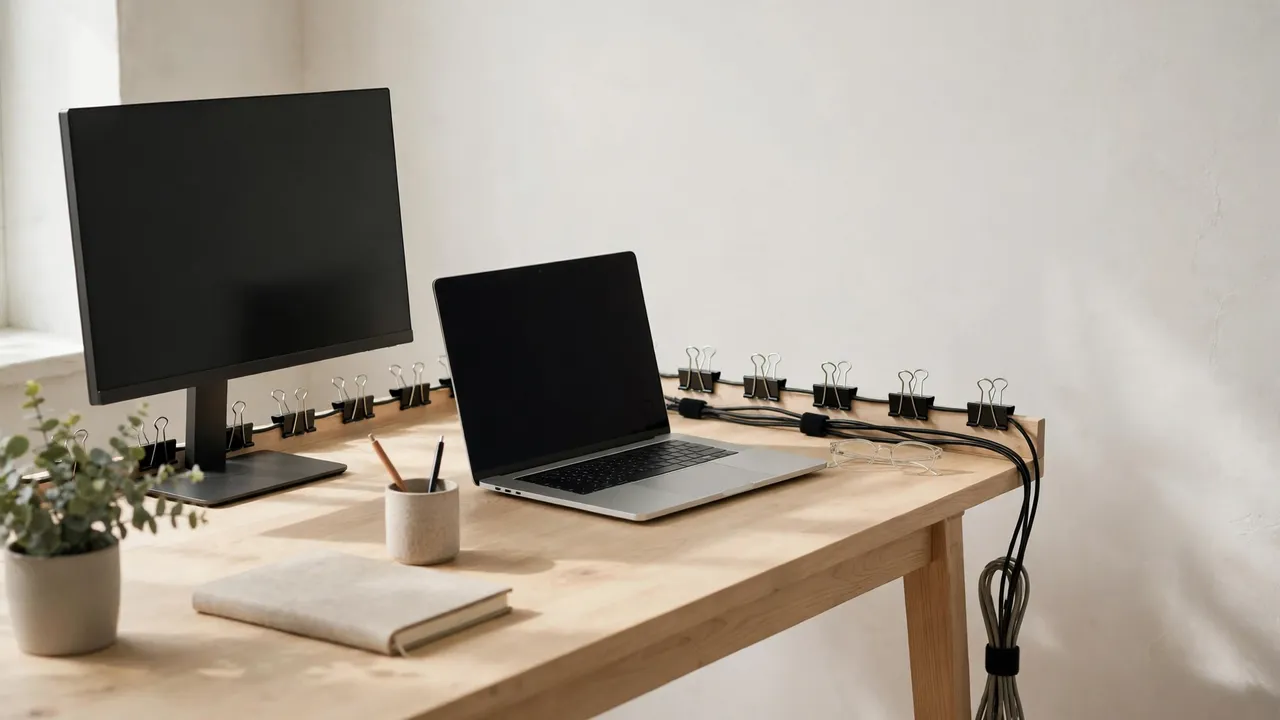
Yes — you can hide desk cables without buying accessories. With DIY desk cable management using things you already have at home — binder clips, rubber bands, twist ties from bread bags, cardboard, tape and old boxes — you can take a tangle of cables off the floor and into a tidy run along the back of your desk in under an hour, spending nothing at all. Unplug everything first, group the cables by device, bundle each group loosely, clip the bundles to the back edge of the desk, and hide the power strip in a ventilated cardboard cover.
Most of what you need is already in a kitchen drawer or a recycling box. The result will not look like a showroom, but it will look calm and organised — and in a rented home it can be taken down in minutes without leaving a mark.
DIY Desk Cable Management With Household Items
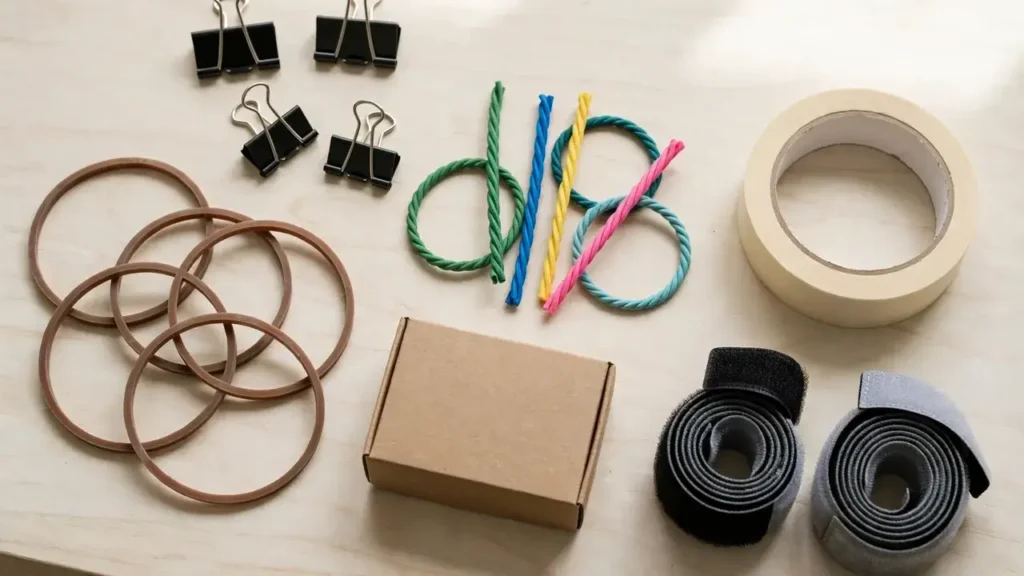
Gather the free materials before you start. You almost certainly have most of these already, and anything you do not have probably has a substitute in the same list.
- Binder clips (medium or large): they grip the back edge of a desk and hold a cable in their folded metal arms.
- Rubber bands: for bundling cables loosely together. Wide bands are best; thin ones can bite into insulation if pulled too tight.
- Twist ties from bread bags: short, gentle and easy to undo. Save a few of different colours to help identify cables later.
- Reusable ties you already own: hook-and-loop straps from old packaging, or the ties that came with a new appliance.
- Cardboard: a cereal box, a delivery box or a shoebox, to cover or shield a power strip.
- Tape: masking tape is kindest to desk surfaces; electrical tape is best for wrapping a bundle rather than sticking it to furniture.
- Old boxes: a shoebox or sturdy gift box can hide a power strip, provided it is ventilated.
- Coloured tape or stickers: for labelling cable ends so you know which plug belongs to which device.
Step 1: Unplug, Untangle and Sort Your Cables
Switch everything off and unplug every cable from the wall and from each device. Unplugging is the only way to untangle the whole mess properly. Pull the desk a little away from the wall if you can, so you can reach behind it comfortably.
Lay the cables out and untangle them one at a time. Follow each cable from its plug to its device and note which goes where: monitor, laptop charger, printer, speakers, lamp or phone charger. If several cables look alike, wrap a small piece of coloured tape or a twist tie of a distinct colour around each end. Labelling now saves a lot of guessing later.
While the cables are out, check them. Look for frayed insulation, cracked plugs, exposed wires or scorch marks. Damaged cables should be replaced, not hidden: a damaged cable will not get safer inside a cardboard cover, and hiding it makes the damage harder to spot.
Step 2: Bundle Each Group Loosely
Take one group at a time and gather the cables so they lie parallel, without twists or kinks. Start near the device end and work towards the power strip, smoothing out tangles as you go. The bundle should be neat but not tight, as a bundle squeezed flat will put pressure on the insulation at the bends.
Fasten the bundle with a rubber band, a twist tie or a reusable tie every 30 to 40 centimetres. Do not pull it tight; you should be able to slide a finger under it. Check rubber bands every few months, as old bands can perish and snap, especially near a warm adapter.
Step 3: Clip the Bundles to the Back Edge of the Desk
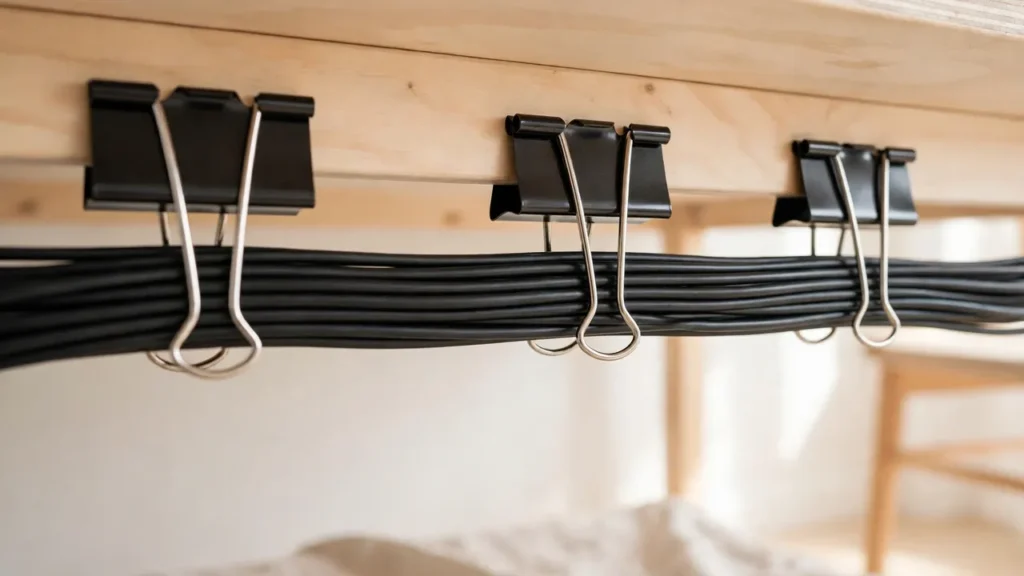
Clip a large binder clip onto the back edge of the desk, with the metal arms folded back, and feed a cable bundle through the gap between the arms. The clip grips the desk edge and the arms cradle the cables, holding them up and out of sight. Space the clips every 30 to 40 centimetres along the back edge, so no length of cable sags towards the floor.
For a single cable, such as a phone charging cable, use a smaller binder clip and thread the cable through one of the folded arms. This also stops the cable falling behind the desk when you unplug it. The same trick works for a headphone cable or a mouse cable that you want to keep within reach but off the desk surface.
If your desk has no edge you can clip onto — a glass top, a very thick top or a desk with a raised lip, for example — use tape instead. Make a small tape sling under the desk edge and rest the bundle in it, using masking tape or painter’s tape, which peels off cleanly. Test it on a hidden spot first if the desk is valuable or rented, and replace the tape every few months, as old tape can dry out and leave residue.
Step 4: Use Your Desk’s Own Features
Most desks already have hiding places built in. A modesty panel, a drawer, a shelf, a cable hole or a gap between the desk and the wall can all hide cables if you route them deliberately, and using them costs nothing.
If your desk has a cable hole, feed the cables through it rather than letting them drape over the back edge. If the hole is too small for a plug to pass through, feed the cables through first and then plug them in at the far end.
If the desk sits against a wall, the narrow gap between the desk and the wall is a natural channel. Let the bundles drop into that gap and rest them on a small piece of cardboard so they do not sit directly on the floor.
Step 5: Hide the Power Strip in a Ventilated Cardboard Cover
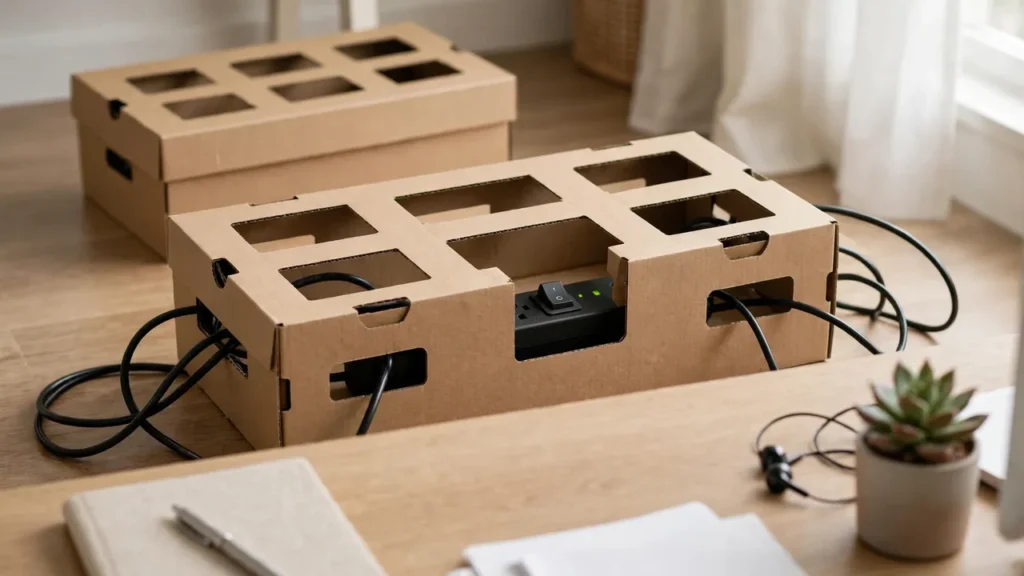
The power strip is usually the ugliest part of a desk setup, and it is also the part that needs the most care. You can hide it with a cardboard box, but only if you do it safely. The golden rule is ventilation: a power strip and its adapters generate heat, and enclosing them in a sealed box is a fire risk. Never cover a power strip with fabric, never seal it in a box with no airflow, and never cover an adapter that feels warm to the touch.
Take a sturdy cardboard box — a shoebox is about the right size for a small strip — and cut a wide opening in the top or the side, plus a slot at each end for cables to enter and leave. Cut a few extra ventilation holes in the sides if the box is deep. The strip should sit inside with its switch facing out through an opening, so you can switch it off without lifting the cover.
Place the strip inside and feed the cables through the slots, keeping the entry and exit points loose so no cable is bent sharply where it passes through the cardboard. Set the box on the floor behind the desk, or on a low shelf, out of the way of feet and chair legs. After an hour, lift the cover and check that nothing feels hot; if it does, remove the cover, spread the adapters out, and check the strip is not overloaded. Keep the load within the strip’s rating, follow the manufacturer’s guidance, and ask a qualified electrician if you are unsure or need fixed wiring work.
Step 6: Tidy the Drops and the Desk Surface
With the main runs hidden, the short drops — the lengths from the desk surface down to the back edge — are what people actually see. For a monitor, route the cable down the back of the monitor stand, then straight down behind the desk into the clipped bundle. For a laptop on a stand, bring the charging cable down behind the stand so it is hidden from the front.
For a phone charger or a cable you use every day, clip it to the back edge with a binder clip and leave just enough length on the desk to reach your device.
Common Mistakes to Avoid
- Pulling bundles tight: tight cables tug at sockets, wear at bends and make it hard to move a monitor or laptop. Leave slack at both ends.
- Overloading one clip: spread heavy cables across several clips. A clip that pops off under weight will drop the whole bundle.
- Sealing the power strip in a closed box: a strip needs airflow. Use a cover with large openings, and never cover a warm adapter with fabric or cardboard.
- Running cables where they can be crushed: keep cables away from chair legs, drawer runners and any moving part of a standing desk.
- Creating a trip hazard: never run a cable across a walkway or across the floor in front of the desk.
- Hiding damage: frayed or cracked cables should be replaced, not tucked out of sight.
- Daisy-chaining power strips: never plug one power strip into another to gain extra sockets. Use a strip with enough sockets, and check its rating.
Troubleshooting
The binder clips keep slipping off. The desk edge may be too thick, too thin or too smooth for the clip size you are using. Try a larger clip, clip onto a thinner part of the edge, or switch to tape. If the cables slip through the arms, fold the arms in closer together or use a smaller clip.
Frequently Asked Questions
Can I really hide desk cables without buying anything? Yes, for most simple setups. Binder clips, twist ties, rubber bands, cardboard and tape will hide the cables of a laptop, a monitor, a phone charger and a lamp. The method struggles only with very heavy adapters or a large number of devices.
Will binder clips damage my desk? They can leave a small mark on a soft or polished surface if left in one place for a long time, so move them occasionally and test one on a hidden spot first if the desk is rented or valuable.
Is it safe to hide a power strip in a cardboard box? Only if the box is well ventilated, with large openings for air and for cables, and the strip is not overloaded. Never seal a strip in a closed box, never cover it with fabric, and check that nothing feels hot after an hour of use. If you are unsure, leave the strip uncovered or ask a qualified electrician.
DIY desk cable management costs nothing, leaves no marks and takes less than an hour. Start with the clips and ties you already own, hide the power strip in a ventilated cover, and check the setup after a day or two.