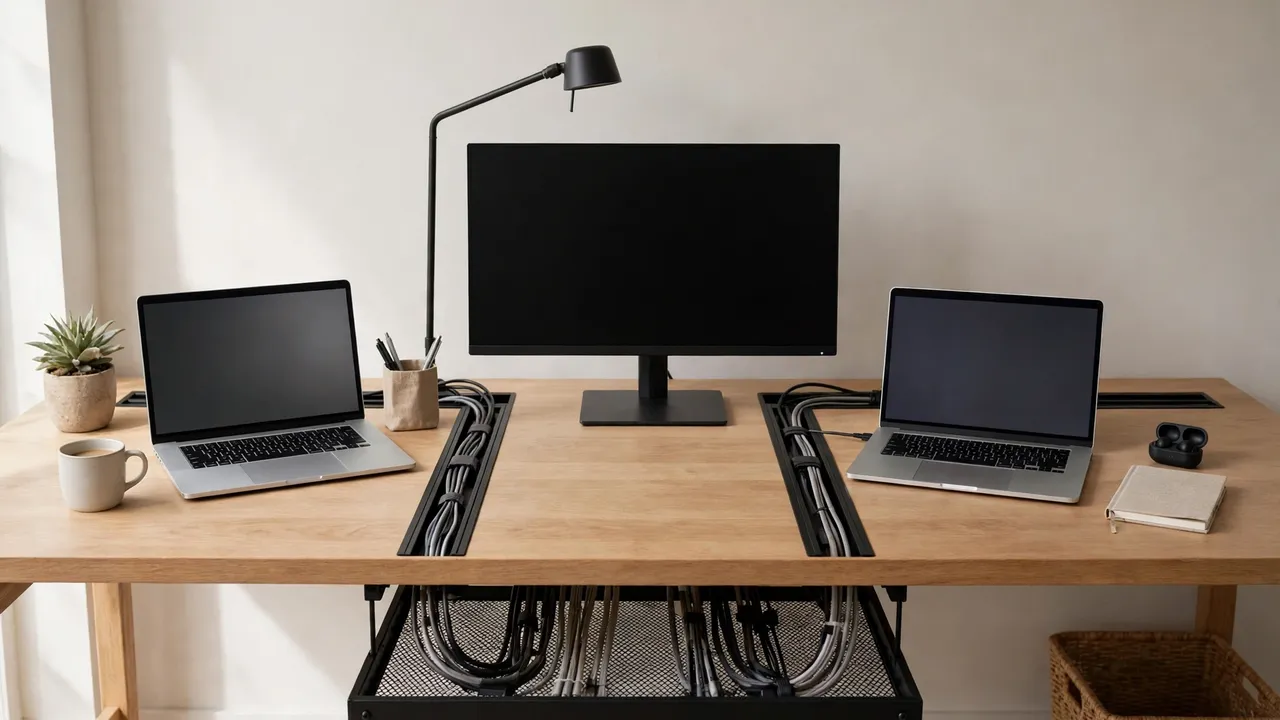
Good shared desk cable management gives every person their own clearly labelled route from device to power, keeps communal cables — the monitor, the dock, the lamp — on one fixed route, and leaves nothing loose on the floor or trailing across someone else’s space. The simplest system that works is a shared under-desk tray for communal kit, one labelled cable channel per person, a single power strip plugged directly into the wall socket, and a two-minute set-up and pack-away routine.
What Makes Shared Desk Cable Management Different
On a desk used by one person, a tangled cable is an annoyance. On a shared desk, it is a dispute over whose charger is whose, who unplugged the monitor, and why there is no free socket. Three things change when more than one person uses the same desk. First, cables belong to different people, so a tidy bundle can still be unusable if nobody can tell which cable is theirs. People arrive and leave at different times, so the desk must work both full and empty. And power is shared, so one person’s extra monitor can quietly push a strip towards its limit while everyone assumes somebody else checked.
Start With a Shared Plan
Before buying anything, answer three questions with the people who use the desk — or, in a co-working space, with the person who manages it. Also agree who looks after the shared tray, and whether drilling is allowed: in a rented home or co-working space it usually is not, so plan on adhesive, clamp-on, and freestanding fixings.
- Who uses the desk, and when? Two people at once, in shifts, or a rotating cast of hot-deskers? Simultaneous users need separate zones; shift users need a fast changeover.
- What stays, and what travels? Monitors, a dock, and a lamp usually stay; laptops, phones, and chargers travel. What stays gets a fixed route.
- How many wall sockets are there? Count wall sockets, not strip sockets: a strip adds outlets but not capacity.
Divide the Desk Into Zones
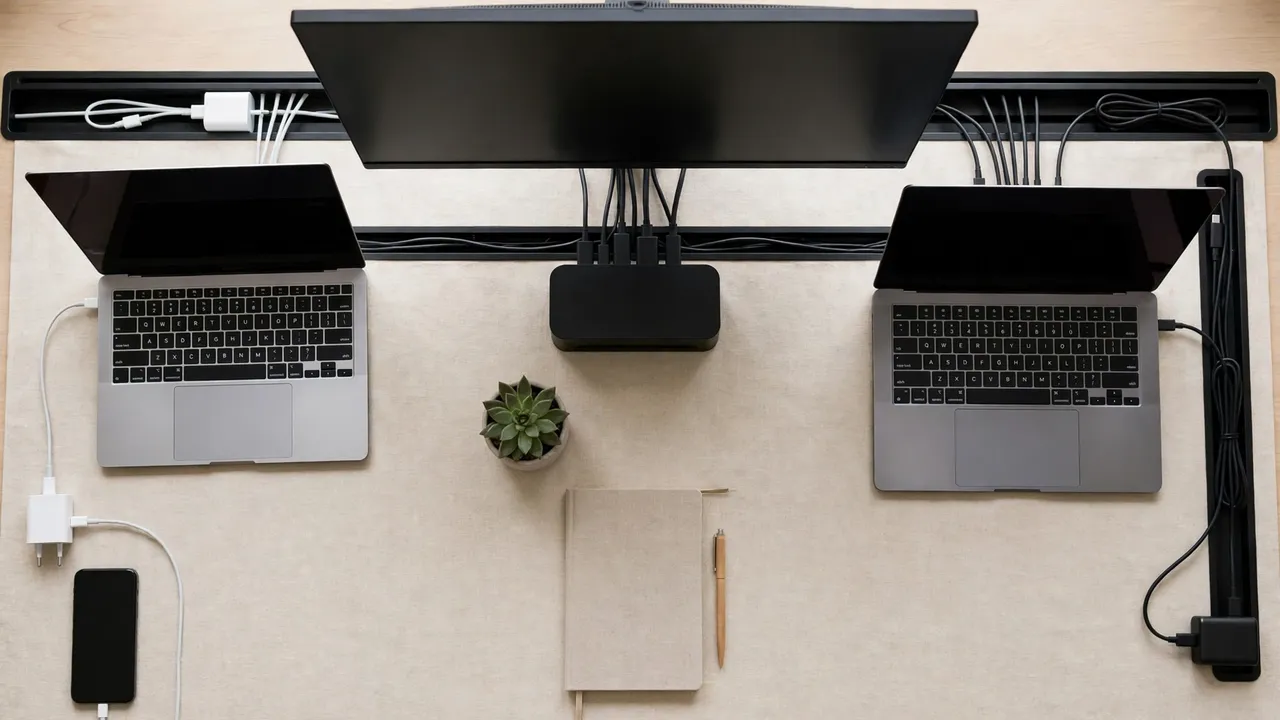
Zoning is the most useful idea in shared desk cable management: instead of one bundle for the whole desk, split it into zones, and give each zone a job.
Personal zones
Each regular user gets a personal zone, roughly the width of their seating position, where their laptop cable, phone charger, and headphone cable live and nowhere else.
The communal zone
The communal zone holds everything that belongs to the desk rather than to a person: the monitor, a shared docking station, a desk lamp, or a printer cable. These get the most permanent route — usually a cable tray under the desk.
The power zone
Power lives in one place, low down and reachable: one power strip under the desk near the wall socket, its switch and sockets accessible without crawling underneath. Each person’s cables run from their zone to the strip along the underside of the desk, not across the floor.
| Zone | What lives there | Who may unplug it |
|---|---|---|
| Personal zone (left) | Left user’s laptop and phone cables | Left user only |
| Personal zone (right) | Right user’s laptop and phone cables | Right user only |
| Communal zone | Monitor, dock, lamp, printer | Nobody without asking |
| Power zone | Power strip, wall socket, adapters | Anyone, for their own plug only |
Shared Power Without Overloading
Power is where shared desks most often go wrong. Agree the rules in advance, because nobody checks the load mid-afternoon.
- One strip, plugged directly into the wall. Never plug one power strip into another: daisy-chaining can overload the first strip and the wall socket.
- Stay within the strip’s load rating. Check the rating printed on the strip. Heaters and kettles are not desk equipment and should never be plugged into a desk strip.
- Count sockets honestly. Two people each needing a laptop and a phone charger, plus a monitor and a lamp, is six sockets. If the strip has four, buy a bigger strip rather than stacking adapters or splitters.
- Give adapters air. Let each one sit flat in a ventilated tray with air around it, never covered by fabric, buried under cables, or sealed in a closed box. If one feels uncomfortably hot, unplug it, let it cool, and check the manufacturer’s guidance.
- Keep the strip reachable. The switch and every socket should be reachable without moving the desk or crawling underneath it.
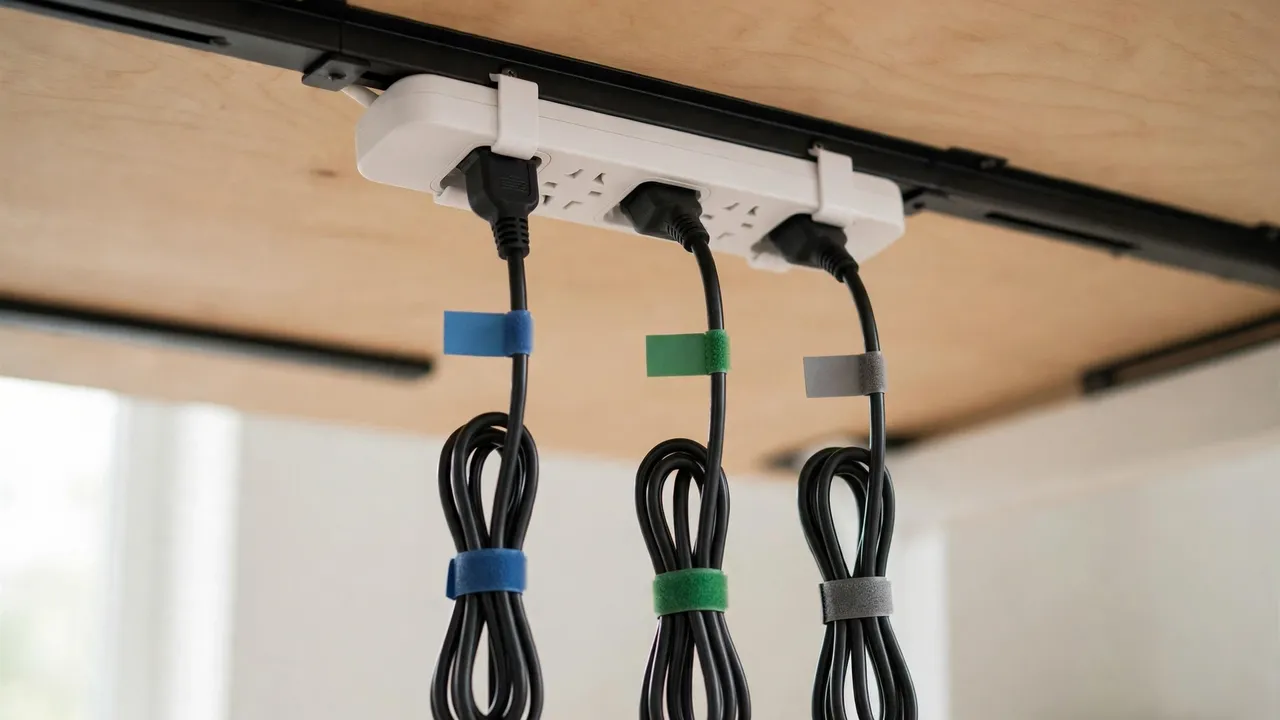
Make a socket map: a small label beside the strip saying which socket is for what — “Monitor”, “Dock”, “Left laptop”, “Right laptop”, “Spare”. For fixed wiring, ask a qualified electrician, and check the landlord’s or building manager’s rules first.
Labelling: The Cheapest Fix
Labelling solves the two questions people ask most: “Is this mine?” and “Can I unplug this?” Label every cable at both ends, because a label at only one end is useless when the other end is buried under a desk. Use a colour per person, plus a word: blue for one person, green for the other, white or grey for communal kit. Colour alone is not enough, so add a short written label too: “Sam — laptop”, “Priya — phone”, “Desk — monitor”. Reusable hook-and-loop ties with a write-on panel do this job well.
Label the strip and the tray too: “Desk — do not unplug monitor” beats a verbal warning nobody remembers. In a co-working space, mark communal cables “Property of the space — please leave connected”. Revisit labels every few months, as tape dries out.
Hot-Desking: Quick Set-Up and Tear-Down
Hot-desking is the hardest version of shared desk cable management, because the users change daily and nobody owns the setup. It has to work for a stranger who arrives with a laptop and leaves an hour later.
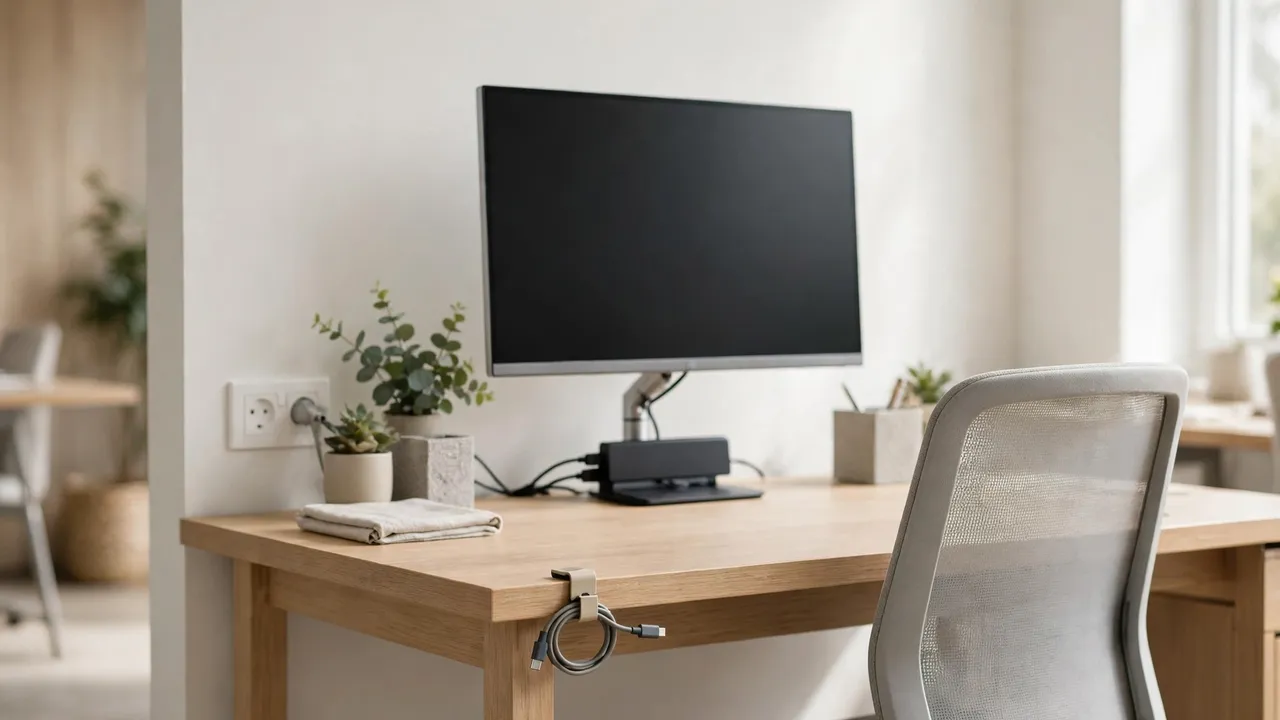
Design the desk so a new arrival can be working within two minutes. The monitor and dock are already connected and labelled, one clearly marked cable — usually a single USB-C cable from the dock — sits in a clip at the front of the desk, and one spare socket is labelled “Guest — laptop”. The new user plugs in one cable and works.
Leaving is just as simple: unplug the laptop cable, return it to its clip, take your own chargers, and leave the communal kit as found. A short note on the desk helps: “Plug your laptop into the marked cable. Leave the monitor and dock connected. Take your own chargers with you.”
Two People at One Desk
Side by side is the easier arrangement. Each person gets half the desk, a personal cable channel at the back of their half, and a share of the strip — and cables should not cross the middle boundary.
Face to face is harder, because cables from both sides meet in the middle. Route everything downwards rather than across: each person’s cables drop into the shared tray underneath and run along it to the power zone, never crossing the desktop. A monitor shared between two facing users is rarely a good idea; give each person their own screen. Before either person adds a device needing a permanent cable, they should check with the other person and update the socket map.
Shared Family Desks
A family desk adds children, homework, and gaming. Give each family member a colour and a small cable pouch or hook for their own chargers — a pouch in a drawer works better than a clip for short cables that are easily lost. Keep the power strip out of easy reach of small children, and never let a cable trail where a child can pull a device off the desk. For homework after an adult’s working day, use a short changeover: the adult unplugs their laptop and returns the shared cable to its clip, and the child plugs in their own device. Agree that chargers live at the desk unless you are travelling.
Etiquette for Shared Workspaces
Leave the desk as you found it: return shared cables to their clips, leave communal kit connected, and take your own cables with you. Ask before unplugging anything labelled as communal, or any cable you do not recognise. Do not claim the spare socket permanently — if you need it every day, the desk needs a bigger strip. Keep your kit to your zone, and report a loose tray, a warm adapter, or a damaged cable to the space manager or the other user rather than fixing it with tape.
Materials and Low-Cost Alternatives
Start with three things: a tray, a strip with enough sockets, and labels.
| Item | What it does | Low-cost alternative |
|---|---|---|
| Under-desk cable tray | Holds communal cables and adapters | A sturdy basket or wide channel fixed with adhesive or clamps |
| Adhesive clips or channel | One route per person along the desk back | Hook-and-loop ties and a bulldog clip on the desk edge |
| Power strip, enough sockets | Shared power, plugged into the wall | None — buy the right size once, not splitters |
Check adhesive weight ratings against the weight of the cables they will hold, and check that the desk surface suits adhesive — smooth laminate and painted metal usually hold well, raw wood and textured finishes less so. Clean the surface first and test one fixing under load.
Common Mistakes
- One big bundle for everyone. Tying all cables together makes it impossible to remove one person’s kit without disturbing everyone else’s. Keep personal and communal cables separate.
- No labels. An unlabelled shared desk is a desk where every cable is a guess. Label both ends of every cable, and label the strip.
- Hiding cables where they cannot be reached. A setup that cannot be changed will be ripped out the first time a cable needs replacing.
- Covering adapters or overfilling the tray. Adapters need air, and a packed tray traps heat. Leave a quarter of the tray empty.
Troubleshooting
Someone keeps unplugging the monitor. Label the monitor socket clearly and add a labelled spare socket; if the strip is full, replace it with a larger one plugged directly into the wall.
Cables keep migrating across the desk. Add a clip or short channel at the back of each zone, and agree that cables do not cross the middle boundary.
The tray keeps falling down. The fixings do not match the weight. Check the adhesive weight rating, clean the surface, and spread the load across more fixings.
Frequently Asked Questions
How many sockets does a shared desk need?
Count every device that stays plugged in, then add two: one spare for a visitor and one for a phone charger. Two people with laptops, a shared monitor, and a lamp need at least six sockets.
How should I label cables in a hot-desking space?
Label the communal cables, not the users: “Desk — monitor — please leave connected” is more useful than a person’s name, because the users change daily.
Can I use adhesive fixings in a rented or co-working space?
Often yes, but check the rules first — some landlords and space managers restrict them, and some surfaces do not hold adhesive well. Check the weight rating and test one fixing first.
A Shared Desk That Stays Tidy
Zone the desk, label both ends of every cable, keep communal kit on its own fixed route, share one strip plugged directly into the wall, and agree a short set-up and pack-away routine..