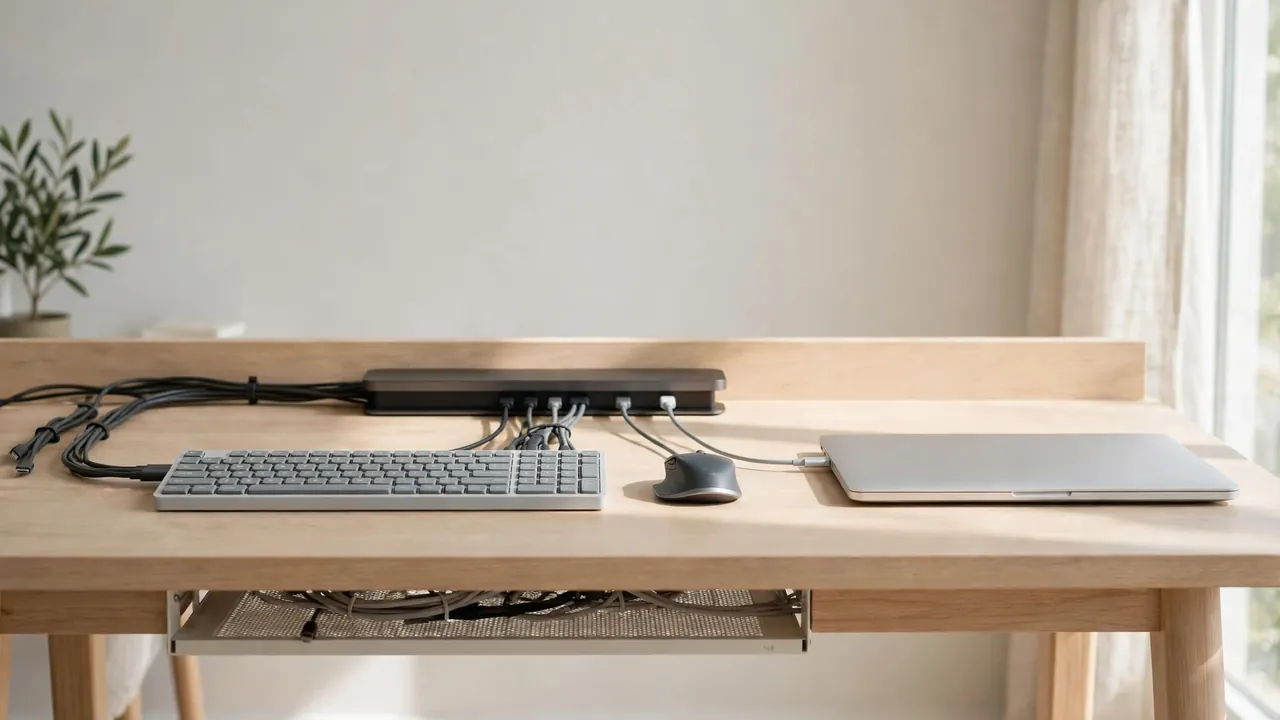
Good USB-C docking station cable management comes down to one idea: the dock is the hub, and every cable should run to it along a short, planned route with a little slack. Put the dock where you can reach its ports, run one host cable to your laptop, group the cables for your monitors, keyboard, mouse and network, and leave a little slack at the laptop end.
Why a Dock Needs Its Own Approach
Without a dock, every peripheral has its own cable trailing to the laptop. With a dock, the laptop side shrinks to a single USB-C host cable, while the dock collects everything else: monitor cables, keyboard and mouse, Ethernet, perhaps a headset, and the dock’s own power brick. That is easier to tidy, but it leaves a thick bundle all leaving one small box, in different directions.
Map Your Ports Before You Move Anything
Start by unplugging everything and looking at the dock. Note what each port is for: a host port for the laptop, one or two video outputs, several USB ports, Ethernet, audio, a power input, and perhaps a memory card slot or spare USB-C port. Knowing which port does what stops you guessing every time you plug something in.
Next, decide where the dock will live: on the desktop near the back edge, or mounted underneath near the back, within easy reach of the monitors and of your hand. A dock on the desktop is easiest to reach but takes up space. One underneath is tidier, but only works if the ports you use often stay accessible.
Think about the direction each cable leaves the dock. Monitor cables run up or sideways to the screens; keyboard and mouse cables run forward; Ethernet and power run down towards the floor. Lay the cables out loosely before fixing anything.
What You Will Need
- Hook-and-loop cable ties in two sizes — small ones for single cables, wider ones for the bundle.
- Adhesive or screw-fixed cable clips sized to the cables they will hold.
- A cable tray, basket or channel under the desk, if you do not already have one.
- A label maker, or plain labels and a pen, for marking cables and ports.
- Coloured tape or coloured hook-and-loop ties for colour-coding.
- A tape measure, for checking cable lengths and the desk’s range of movement.
Step by Step: Organising Dock Cables
Step 1: Place the dock and its power brick
Set the dock in its chosen spot and put its power brick somewhere it can breathe. The brick is often the largest and hottest part of the setup, so do not bury it under cables, wedge it into a sealed box, or cover it with papers or fabric. Lay it flat on a ventilated surface, with its cables entering and leaving without sharp bends.
Step 2: Connect the downstream cables first
Plug in everything except the laptop host cable: monitors, keyboard, mouse, Ethernet and audio. Working from the dock outwards is easier, because you can see which port each cable belongs to and route it in the right direction from the start. Leave each cable a little longer than it needs to be for now. As you connect each one, label both ends — “Left monitor” at the dock end and at the screen end.
Step 3: Route the cables in groups
Group cables by where they are going, not by what they are. Monitor cables go together towards the screens; keyboard, mouse and headset cables go together towards the front of the desk; Ethernet and power go together downwards. Run each group along the back edge of the desktop or underneath it, using clips to hold it in place. Give every cable a gentle curve where it leaves the dock rather than a sharp right angle, which stresses the cable where it meets the plug.
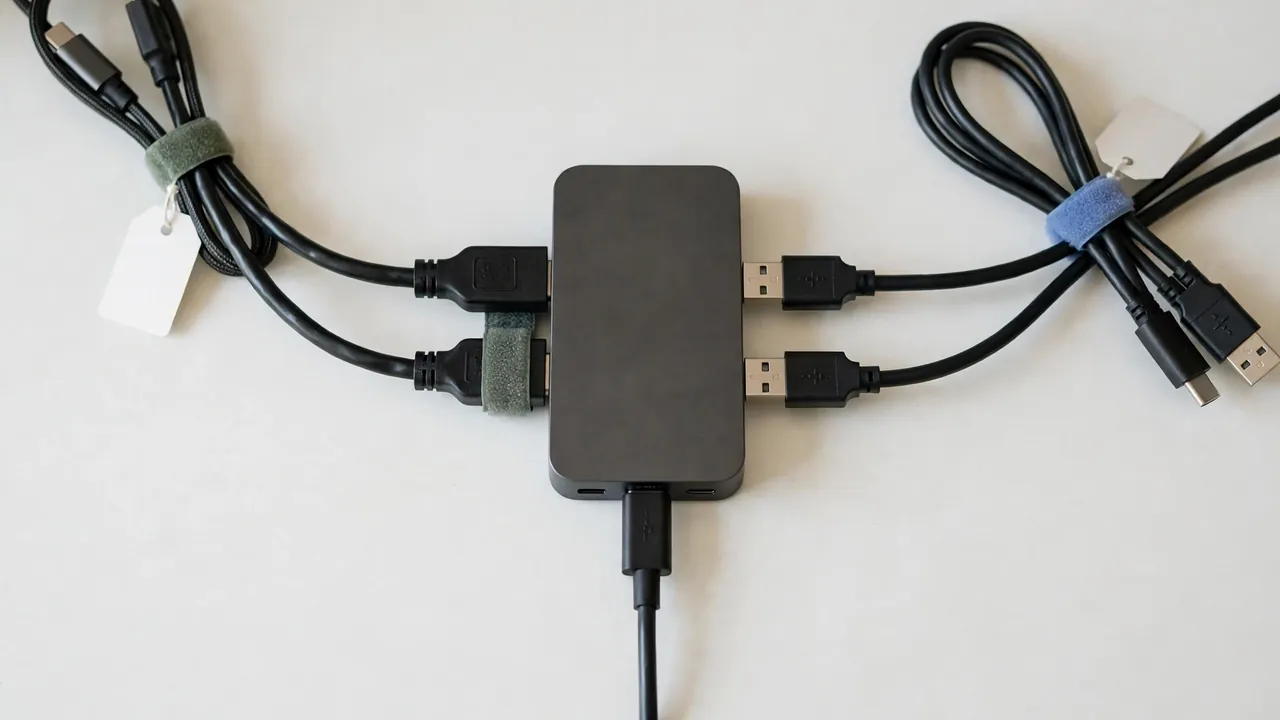
Step 4: Connect the host cable last
The host cable — the single USB-C cable between the dock and your laptop — goes in last, because it is the one you will unplug most often and the one that must never be under strain. Route it so it reaches your laptop with a soft loop of slack, absorbing the small movements of the laptop without pulling on either connector. Support it with a clip a short distance from the dock, so the weight of the cable is not hanging directly from the USB-C port.
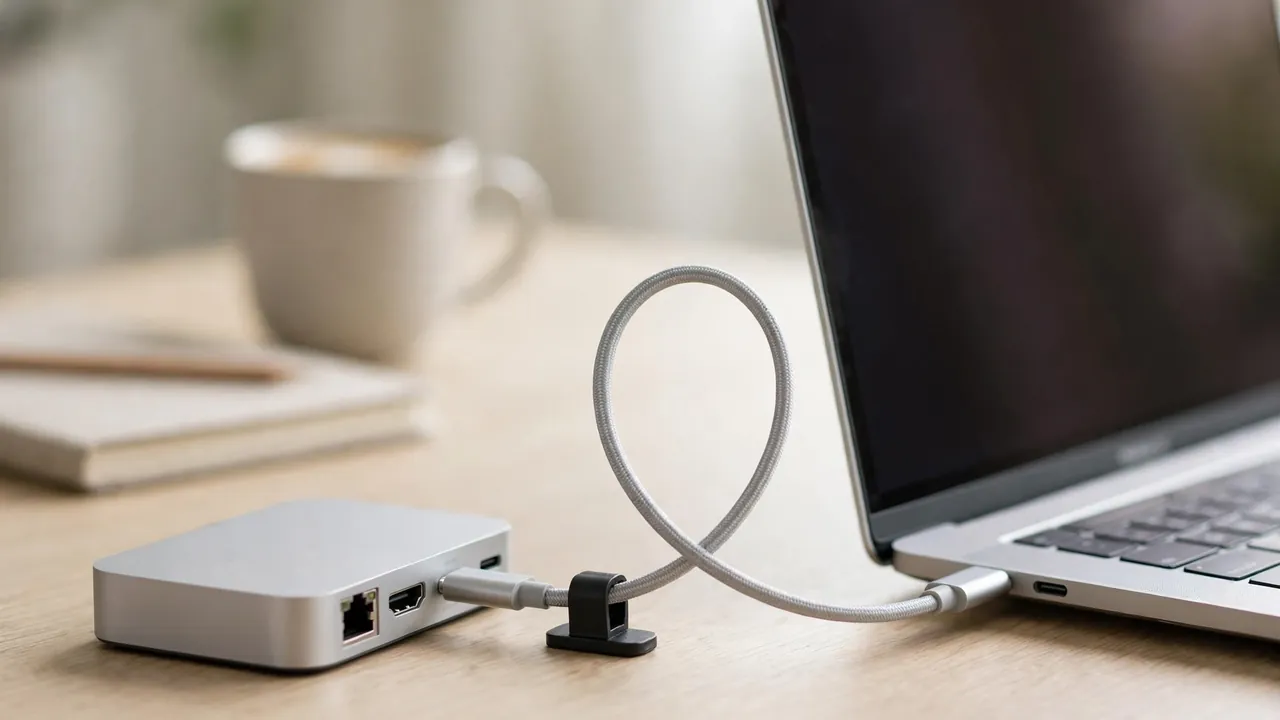
Step 5: Take up the slack and fix the bundle
Once everything is connected and working, take up the extra length cable by cable. The aim is a gentle loop of slack near each device and near the dock — about a hand’s width is a good guide — not a tight straight run and not a tangled coil. Fasten the bundle with hook-and-loop ties, wrapped snugly but not tight: you should be able to slide a finger underneath.
Cable Lengths: Shorter Is Not Always Better
It is tempting to buy the shortest possible cables, but a cable that is exactly the right length on a fixed desk becomes too short the moment anything moves. A monitor that tilts or a keyboard that slides forward needs a little spare length. Measure each route, add a small amount for slack and movement, and choose the nearest sensible length above that.
Standing Desks: Let the Desk Move Without Tugging the Dock
On a height-adjustable desk, the dock and everything on the desktop travel up and down together, so cables between them need little extra slack. The cables that do need it are the ones connecting the desk to the room: the dock’s power lead and the Ethernet cable. Before fixing any of those, raise the desk to its highest position and check that each one still reaches with slack to spare, then lower it fully and check the extra length does not pool on the floor or catch in the frame. Route the descending cables down a desk leg with clips.
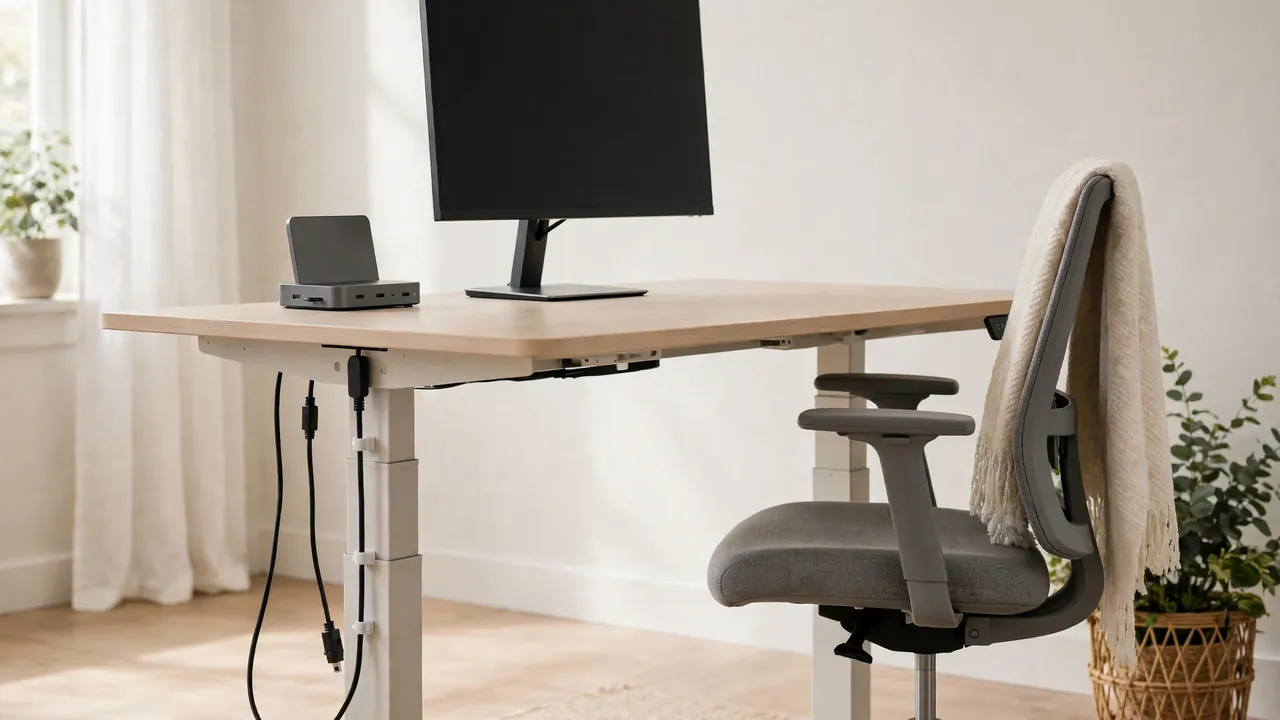
Protecting the Single Host Connector
Strain on a USB-C connector comes from three things: the weight of the cable hanging from the port, sideways pulls when the laptop is moved, and repeated plugging and unplugging at an angle. Support the cable close to the dock and close to the laptop so neither connector carries its weight, and keep the route clear of anything that could snag it.
Labelling and Colour-Coding That Actually Helps
Labelling is the cheapest upgrade in cable management, and it pays for itself the first time something stops working. Label both ends of every cable with the device it serves, and label the dock’s ports if they are not already marked clearly. Colour-coding works well alongside labels: use a different coloured tie or band of tape at each end of each cable — one colour for monitors, one for USB peripherals, one for network, one for power.
Hook-and-Loop Ties Versus Cable Ties
Hook-and-loop ties are the better default for a docking station, because dock cables change: monitors get swapped, a new peripheral arrives, a cable fails. Hook-and-loop opens and closes without tools, does not damage cables, and can be re-used. Single-use zip ties are cheap and neat, but they can only be removed by cutting, and a careless cut can slice into a cable. If you use them, choose releasable ones and leave them loose enough to slide a finger underneath.
Ventilation and Access: Do Not Bury the Dock
A dock produces heat while it works, so it needs air around it and it needs to stay reachable. That rules out the tidiest-looking option — pushing the dock to the back of a deep tray and piling cables on top of it. Keep the dock on top of the bundle or beside it, with its vents clear, and route cables around it rather than over it. The same applies to the power brick: never cover it.
Common Mistakes to Avoid
- Pulling the host cable taut. Leave a soft loop of slack so the laptop can move without tugging its connector.
- Burying the dock under its own cables. The dock needs air and access. Route cables around it, not over it.
- Using single-use zip ties on cables you will change. Use hook-and-loop, or releasable ties at most.
- Covering the power brick. Never cover a hot adapter or enclose it in a sealed box.
- Daisy-chaining power strips to reach the dock. Move the power strip instead, and never overload a socket.
- Routing cables where the desk frame can crush them. Keep cables clear of hinges and lifting columns.
Troubleshooting Dock Cable Problems
Monitors flicker when the desk moves. A video or host cable is being tugged at full height. Raise the desk to the top of its travel, watch the cables, and add slack to any that go taut.
The laptop charges intermittently. Check the host cable first, then the dock’s power brick and mains lead. Make sure every plug is fully pushed home. Charging capability varies by dock and laptop, so check both manuals rather than assuming any USB-C cable will charge any laptop.
The dock feels hot or shuts down. Switch it off, move cables off the top, clear the vents, and make sure the power brick is not covered. If it still runs very hot with clear air around it, follow the manufacturer’s guidance.
Cost-Conscious Alternatives
You do not need a full kit. Hook-and-loop ties and a handful of adhesive clips will handle most setups for very little money. Before buying anything, try the free steps: unplug everything, group the cables by destination, label them with tape and a pen, and re-route them with the slack in the right places.
Frequently Asked Questions
Should the dock sit on the desk or under it? On the desk is easier to reach and better ventilated; under the desk is tidier but harder to reach. If you swap cables daily, keep it on the desk. If everything is plugged in once and left alone, under the desk works well, provided the vents are clear and you can reach the power button.
Can I use any USB-C cable as the host cable? No. The host cable needs to suit your dock and laptop, and capabilities vary by model and by cable. Check both manuals before buying a replacement.
Final Check
Good USB-C docking station cable management is a layout that stays tidy because every cable has a planned route, a label, and enough slack to do its job. Check it once by raising and lowering the desk and reconnecting the laptop.