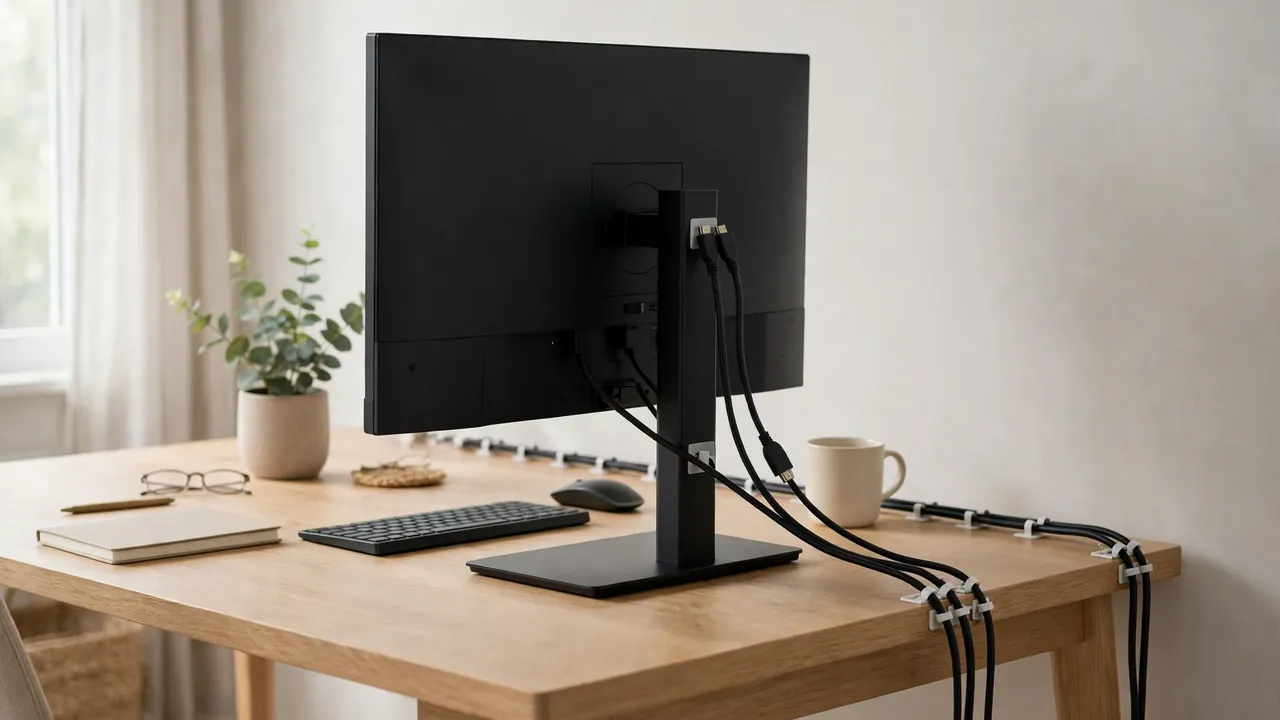
You can stop monitor cables from getting tangled by giving every cable its own fixed route, keeping parallel cables parallel, bundling them loosely with reusable ties, and leaving a small slack loop at the monitor end instead of a hanging coil. Unplug everything, untangle it once, label each cable, route them together along one path, and fix them in place with clips. Cables tangle when they are free to move; fixed cables do not.
Monitor cable tangling is rarely caused by having too many cables. It is caused by cables that hang loose, cross over each other, and get moved every time the monitor is adjusted, the desk is cleaned or something is plugged in. Each small movement twists the cables a little further, and after a few weeks they have knotted themselves into a mass that takes half an hour to undo.
Why Monitor Cable Tangling Happens
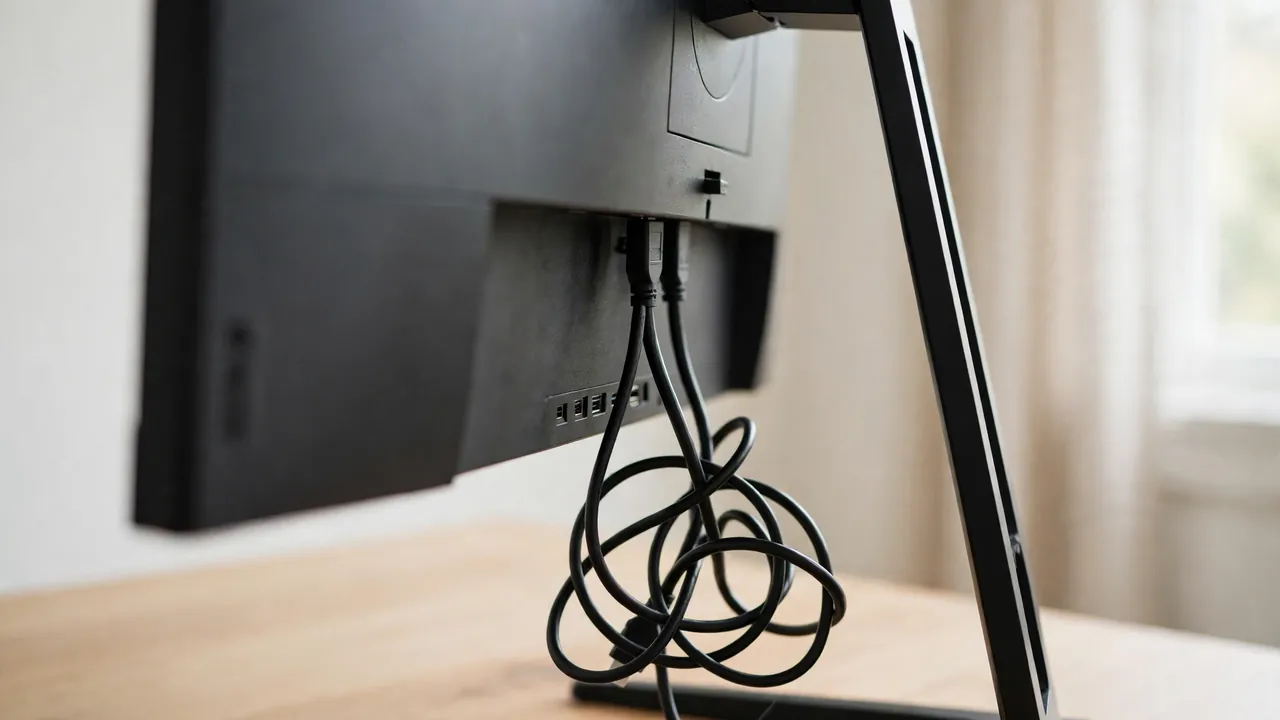
Cables tangle for four reasons, and most desks have at least three of them. First, loose cables swing: a cable hanging free moves every time the monitor is tilted or the desk is bumped, wrapping a little further around its neighbours. Second, crossed cables knot — any movement pulls the crossing tighter until the two cables lock together.
Third, excess length coils: a cable much longer than its route loops and coils, and each loop catches the cables around it. Fourth, changes add chaos — every time a device is plugged in or removed, a cable is added or pulled through the existing mass, dragging the others with it.
The fix addresses all four: fix the cables so they cannot swing, keep them parallel so they cannot cross, coil excess length neatly out of the way, and follow a simple rule for changes — unbundle, change, re-bundle — instead of forcing a cable through the existing mass.
What You Will Need
- Reusable hook-and-loop cable ties: the single most useful item here. They hold a bundle together, open easily for changes, and can be re-used indefinitely.
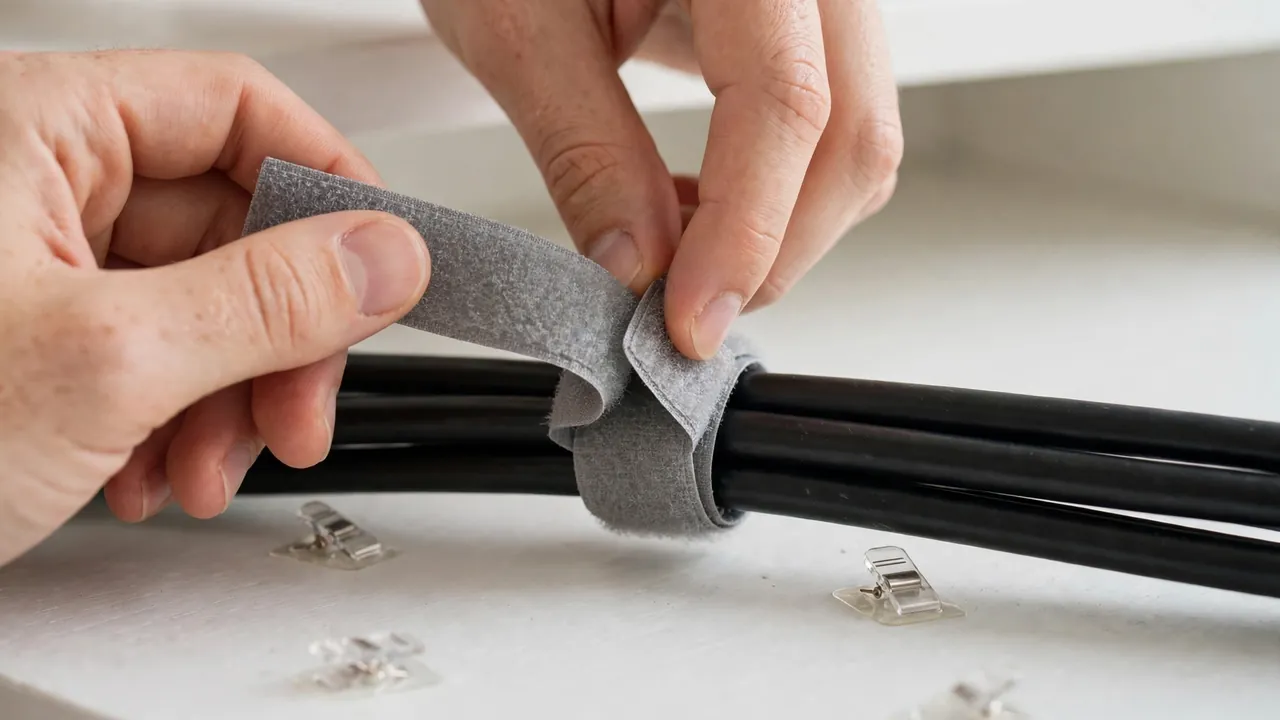
- Adhesive cable clips: to fix the cable route to the desk so the cables cannot swing.
- A cable sleeve, spiral wrap or split tubing: to turn a bundle into one smooth tube that cannot catch on anything.
- A cable tray or basket: optional, but the best place to hide excess length and keep the bundle off the floor.
- Coloured tape or small labels: to identify each cable at both ends.
- Shorter cables, if needed: a video or power cable far too long for its route will always cause trouble. Replacing one oversized cable is often cheaper than fighting it.
Step 1: Unplug Everything and Untangle Properly
Switch everything off and unplug every cable from the monitor, the computer and the wall. Trying to untangle cables while they are still connected is slow, frustrating and risks pulling a connector out at an angle and damaging it.
Take the whole mass off the desk and lay it on a clear surface. Then untangle one cable at a time: pick a cable, find both ends, and work it free from the others, starting at one end and following it through. Do not pull hard on a cable that is caught — pull the knot apart gently, or push the cable back through the loop it is caught in.
As you free each cable, lay it out straight and separate from the others. When all of them are free, check each one for damage: frayed insulation, cracked plugs, bent pins or kinks that will not straighten out. A kinked cable is a weakened cable, and a damaged cable should be replaced rather than routed back into the setup.
Step 2: Label Every Cable
Label each cable at both ends before you route anything. Use coloured tape, small tags or written labels, and keep the system simple: one colour or label per device. The left monitor’s cables get one colour, the right monitor’s another, and the computer, speakers and webcam each get their own.
Labelling feels like a fussy extra step, but it is the step that stops future tangles. Most tangles start when someone needs to unplug one cable and pulls the wrong one through the bundle, dragging the others with it. A label means you pull the right cable first time, and the bundle stays intact.
Step 3: Give Every Cable a Fixed Route
The single most effective anti-tangle measure is to fix each cable to a route so it cannot move freely. Decide the route first: from each monitor, down to the back edge of the desk, along the underside to a central point, and then to the wall or the computer.
Fix the route with adhesive clips spaced every 20 to 30 centimetres along the underside of the desk. The clips hold the cables in place, stop them swinging, and keep them parallel. A cable held by clips every 20 centimetres cannot wrap itself around its neighbour, because it cannot move far enough to do so.
Keep parallel cables parallel. Where two cables run together, lay them side by side, not crossed over each other. If they need to part — one going to the left monitor and one to the right — let them part at a gentle angle, not a sharp crossing. Every crossing is a future knot. At the monitor end, leave a small slack loop so the monitor can be tilted and swivelled without pulling the cable.
Step 4: Bundle Loosely, Then Sleeve the Bundle
Once the cables are routed, bundle the ones that run together. Use reusable hook-and-loop ties, spaced along the run, and keep each tie loose enough that you can slide a finger underneath it. A bundle tied drum-tight puts strain on the cables and makes it impossible to pull one cable out without disturbing the others. A loose bundle holds the cables together while still letting each one slide a little when the monitor moves.
Do not bundle cables that go in different directions. If one cable turns left toward a speaker and another turns right toward the computer, let them part before you bundle. Bundling cables together that are heading different ways guarantees a tangle at the point where they split.
A cable sleeve, spiral wrap or length of split tubing over the bundle is the finishing touch. It turns several cables into one smooth tube with nothing to catch on, and it stops the cables twisting around each other inside the bundle. Sleeve the longest shared run — usually the drop from the desk to the wall — and leave the monitor ends free so you can still adjust them.
Step 5: Deal With Excess Length Properly
Excess cable length is one of the biggest causes of tangling, and it is also one of the easiest to fix. A cable that is a metre longer than its route has to go somewhere, and if it is left hanging it will coil, loop and catch on everything around it.
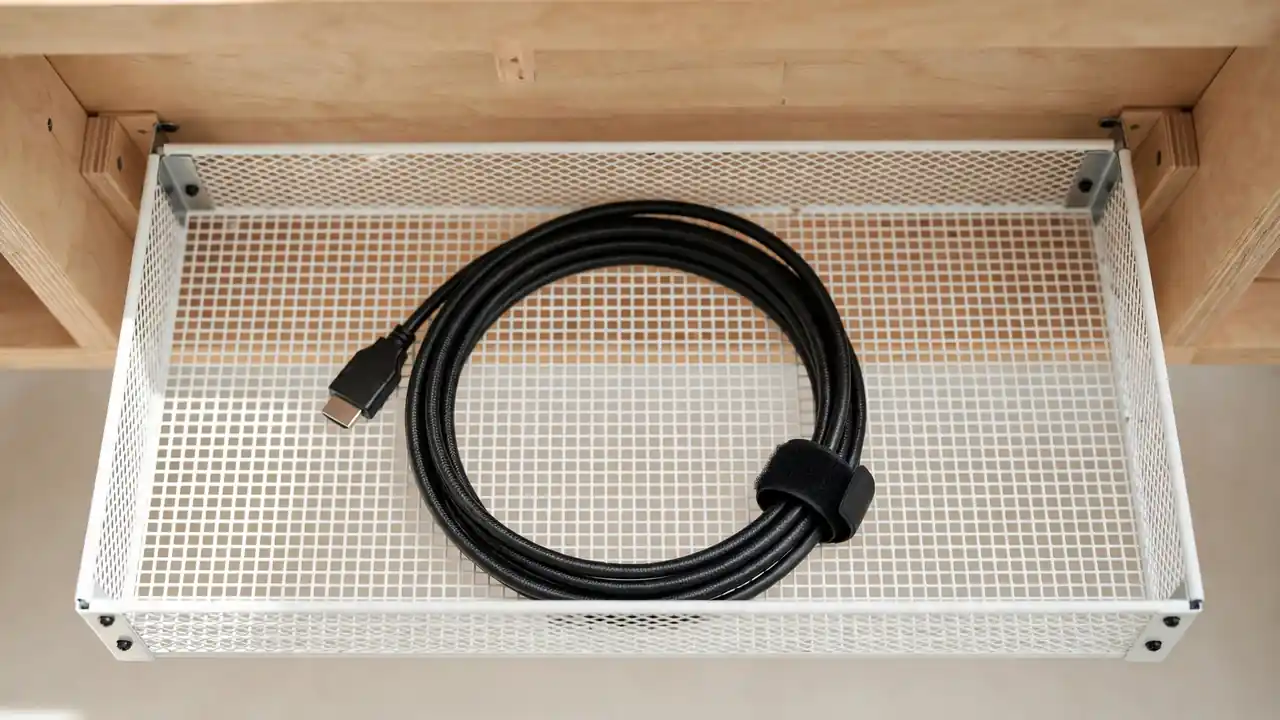
The best place for excess length is inside a cable tray, coiled neatly in a flat loop and secured with a reusable tie. The loop should be wide and gentle — at least the width of your hand across — because a tight coil stresses the cable and is hard to undo later.
If you do not have a tray, coil the excess behind the monitor or under the desk and fix it to the underside with a clip, so it cannot swing or drop. Do not let excess length hang below the desk, and never let it rest on the floor where chair wheels can roll over it. Sometimes the honest fix is a shorter cable: measure the route, add a little slack, and buy the next size up.
Make a Rule for Changes
A tidy setup tangles again the moment someone forces a new cable through it. Agree a simple rule with anyone who uses the desk: when a cable needs to be added or removed, open the bundle, make the change, and close the bundle again. It takes two minutes, and it stops the slow drift back into a tangle.
Keep spare reusable ties and labels in a desk drawer, so the rule is easy to follow. When you add a new device, route its cable along the existing route from the start. Check behind the desk once a month: five minutes of maintenance prevents the half-hour untangle.
Tangle Causes and Fixes at a Glance
| Cause | What it looks like | Fix |
|---|---|---|
| Loose hanging cables | Cables swinging behind the monitor | Fix the route with clips every 20–30 cm |
| Crossed cables | Cables wrapping around each other | Re-route parallel; part at gentle angles |
| Excess length | Loose coils under the desk | Coil neatly in a tray, or buy a shorter cable |
| Unlabelled cables | Wrong cable pulled through the bundle | Label both ends of every cable |
Common Mistakes That Cause Tangling
- Leaving cables hanging free: any cable that can swing will eventually wrap around its neighbours. Fix the route.
- Using single-use zip ties: they cannot be opened for changes, so people cut them or force cables through, and the bundle falls apart.
- Tying the bundle too tight: a tight bundle strains cables and makes changes impossible without undoing everything.
- Letting cables cross: every crossing is a knot in waiting. Keep parallel runs parallel.
- Hiding excess length on the floor: coiled cables on the floor get caught by chair wheels and feet, and pulled out of their route.
Troubleshooting
The cables tangle again within a few weeks
Check whether a cable has slipped out of a clip, or whether a new cable was added without re-bundling. The most common cause is a clip that has come unstuck — clean the surface and refit it, or replace it with a screw-fixed clip if the desk allows. Then re-route the loose cable and re-bundle.
You cannot pull one cable out of the bundle
The bundle is either too tight or the cables are crossed inside it. Open the ties, lay the cables out parallel, and re-bundle loosely. Label the cable you need before you bundle, so you can find it again without opening the whole bundle.
Frequently Asked Questions
Are cable sleeves better than cable ties for stopping tangles?
They do different jobs. Ties hold a bundle together; a sleeve turns the bundle into one smooth tube that cannot catch on anything. Use ties to form the bundle and a sleeve over the longest shared run for the best result. Either one alone is better than nothing, but together they work best.
The Quick Version
Unplug everything, untangle one cable at a time, and label each cable at both ends. Fix a single route with clips, keep the cables parallel, and leave a gentle slack curve at the monitor end. Bundle loosely with reusable ties, sleeve the longest shared run, and coil excess length neatly in a tray. Make a rule — open the bundle to change a cable, then close it again — and check behind the desk once a month. Fixed cables do not tangle.