
For most wooden desks, the best cable routing method is a screw-mounted cable tray under the desktop, holding the power strip and cable slack, with adhesive clips guiding each cable to its device. It keeps cables off the floor, hidden from the front, and easy to change. If you do not want to drill, use an adhesive channel along the back edge for light loads. A clamp-on tray suits a desk you cannot modify at all. The right choice depends on your desk material, the number of cables, and the weight the fixings must carry.
Wood can be screwed into, but it can split, chip, or lose its finish with the wrong screw, no pilot hole, or a strong adhesive pad on veneer. This cable management wooden desk guide covers solid wood, veneer, MDF and chipboard, and laminate.
Which Method Suits Your Desk?
| Method | Best for | Drilling? | Load |
|---|---|---|---|
| Screw-mounted tray | Several cables and a power strip | Yes | High |
| Adhesive channel | Light loads; no drilling | No | Low to medium |
| Adhesive clips | One or two cables | No | Low |
| Clamp-on tray | Desks you cannot drill | No | Medium |
| Grommet hole | Passing cables through the top | Yes | Pass-through only |
| Cable spine | Desks away from a wall | Usually no | Low to medium |
With only two or three cables, start with adhesive clips and a short channel. With a monitor, laptop charger, lamp, and speakers, a screw-mounted tray will be far more reliable.
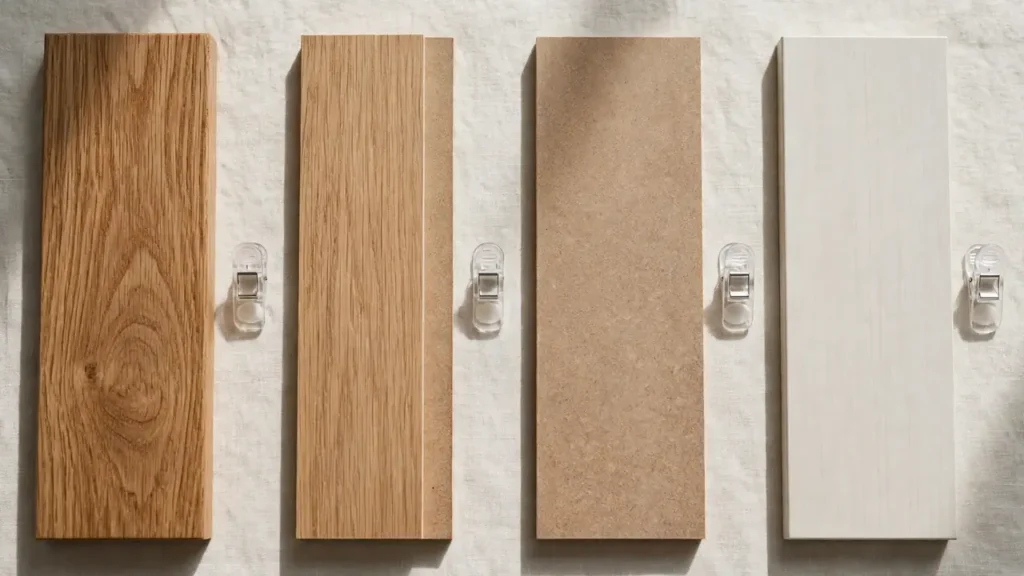
Know Your Desk Material First
Check underneath, inside a drawer, or at an unfinished edge first. If unsure, treat it as the weaker material and use the gentler fixing.
Solid Wood
Solid wood grips screws well, and a small hole underneath is easy to fill later. The main risks are splitting near an edge or joint, and drilling through a thinner section than expected. Keep fixings away from edges and joints.
Veneer Over MDF or Chipboard
Many desks that look like solid wood are thin veneer over MDF or chipboard. Veneer can chip if a drill bit catches it, and strong adhesive can lift it when removed. Screws can work, as the core holds them, but use a sharp bit, a pilot hole, and masking tape over the mark.
MDF and Chipboard
MDF and chipboard are common in flat-pack desks. They hold screws well in the face of the board, but poorly near edges, and can crumble if over-tightened or refitted in the same hole. Use coarse-thread chipboard screws, drill a pilot hole, and do not over-tighten.
Laminate
Laminate has a hard plastic-like surface over chipboard or MDF. It is tough and helps adhesive stick, but can crack around a drilled hole, especially with a blunt bit. Use a sharp bit and drill slowly.
What You Will Need
- Cable tray, raceway, or cable clips, chosen for your desk material and load
- Power strip with a switch, long enough to reach the wall socket without stretching
- Pencil, masking tape, and tape measure; drill and a bit slightly smaller than your screws
- Short wood screws, clearly shorter than your desktop thickness
- Adhesive clips or reusable cable ties; a cloth, a torch, and a hole saw only if drilling a grommet hole
Measure desktop thickness before buying screws. A common top is around 25 millimetres, but flat-pack tops can be thinner. The screw should go no more than two-thirds through, and never poke through the top.
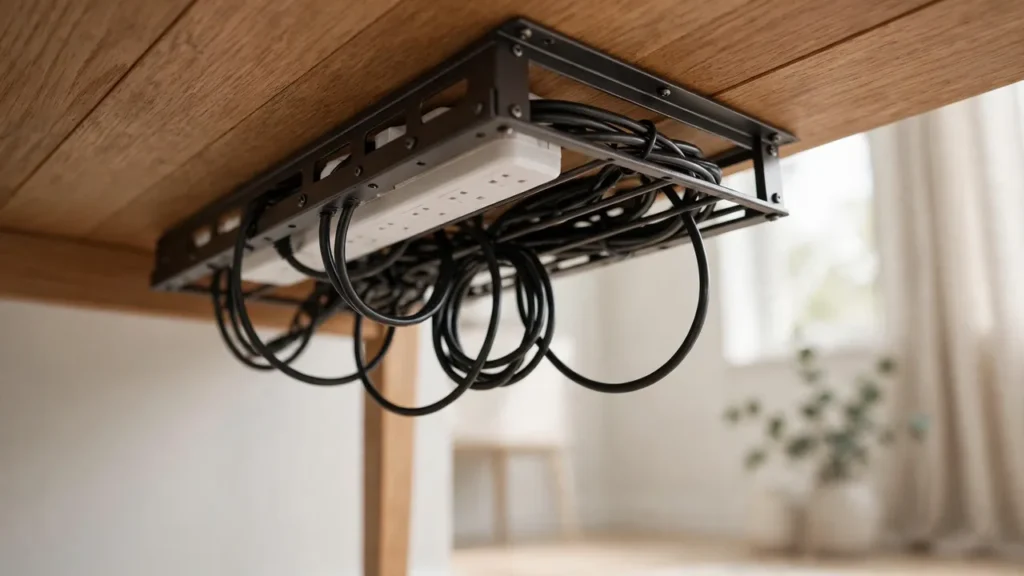
Method 1: Screw-Mounted Cable Tray
This is the most reliable method for several cables. A tray sits under the desktop, towards the back, holding the strip and slack. From the front you see almost nothing.
- Clear the desk and, if safe, turn it on its side.
- Hold the tray 50 to 100 millimetres in from the back edge and mark the holes.
- Check nothing is above the marks: no drawer runner, batten, or bracket.
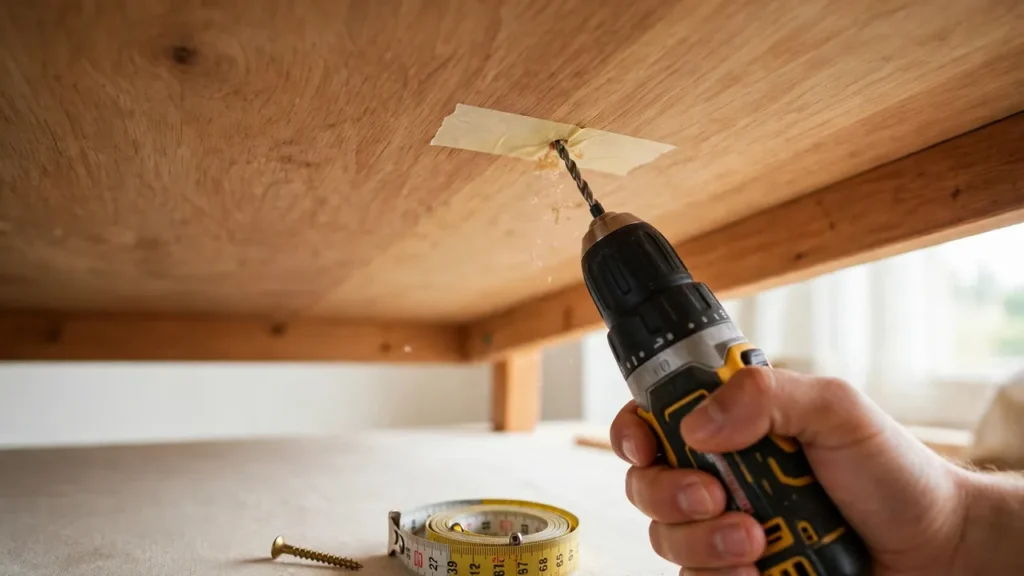
- Drill a pilot hole at each mark, slightly smaller than the screw. On veneer and laminate, tape over the mark first.
- Fix the tray with short screws, firm but not crushing the wood.
- Place the strip inside with sockets facing you, and lay each cable in with a loop of slack.
Method 2: Adhesive Channels and Clips
Adhesive routing is the best no-drill option, and often enough for a simple setup. A channel is plastic trunking with a lid: cables sit inside and the lid hides them. Clips are smaller and hold one cable at a time along a set path.
Most adhesive failures come from a dirty surface, not a weak pad. Wipe the underside clean, let it dry fully, and do not use silicone-based polish there first. Press each pad firmly as instructed, and leave it for several hours before loading it.
Check the weight rating first. A small clip is made for one or two light cables, not a heavy strip or thick bundle. If the weight is close to the rating, use more clips, or switch to a screw-mounted tray. Heat weakens adhesive, so keep mounts away from radiators and warm adapters. On veneer, a pad that holds well may lift the surface when removed.
Method 3: A Raceway Along the Back Edge
A raceway is a longer channel fixed along the back edge, suiting cables that run left to right, for example from a central monitor to a dock and a lamp. Fix it so cables enter and leave without sharp bends. Fill it to no more than two-thirds full, leaving room for one more cable.
Method 4: Clamp-On Trays
A clamp-on tray grips the back edge and hangs underneath, with no screws or adhesive, and can be moved if you rearrange the desk. Check the clamp fits your desktop thickness and its pads sit flat without rocking. Add felt or rubber if no protective pad is supplied. It suits a moderate load; a heavy strip may need two clamps, or a screw-mounted tray.
Method 5: Drilled Grommet Holes
A grommet hole is a round hole through the desktop, fitted with a ring, letting cables pass from above to below. It looks tidy, but it is permanent. Only drill one if you are confident about the position. Choose a spot close to your devices, not where you rest your wrists. Check underneath for drawers and supports, use a sharp hole saw, drill slowly, and support the underside with scrap wood. On veneer, MDF, and laminate, drill from the top with masking tape over the area. If unsure, or the desk is rented, route cables around the back edge instead.
Planning Your Route
List every device first: monitor, charger, lamp, speakers, printer, and phone charger. Put the strip in the tray first, where it gives the shortest run to the wall socket without stretching. Route the longest cables first, then shorter ones around them. Keep power and data cables loosely separated, leave a loop of slack at each device, and label cables you may need to unplug in a hurry. Then look from the front: if you can see a cable, move the tray or add a clip.
Do not run cables where a drawer can crush them or a chair wheel can roll over them. Check each drawer with cables in place. On a height-adjustable desk, leave slack for the full range of movement.
Screws, Pilot Holes, and Thickness
This is where most damage happens. A screw that is too long can break through the top; one with no pilot hole can split solid wood or crack laminate; an over-tightened screw can strip MDF or chipboard. Choose a screw at least 5 millimetres shorter than the desktop: for a 25 millimetre top, a 16 or 18 millimetre screw is sensible for a light tray.
Drill a pilot hole slightly smaller than the screw, and no deeper than its length. Drill straight, clear the dust, and drive the screw slowly, stopping as soon as it is snug. If a screw feels loose in MDF or chipboard, remove it and drill a fresh hole nearby. Keep fixings at least 25 millimetres from the edge and away from joints.
Protecting the Finish and Power Safety
Before drilling, put masking tape over the mark. Before sticking anything down, clean the surface and test the adhesive on a hidden area. A sharp bit at low speed gives a cleaner hole. Do not let a warm adapter rest against a polished surface: put it in the tray with air around it.
Put the strip where you can reach its switch, where its cable is not stretched, and where it is not trapped. Do not plug one strip into another, and do not overload a socket or strip. If you need more sockets, use a strip with more outlets, or ask an electrician about adding a socket. Keep adapters in open air, not wrapped in cloth or covered with papers, as covering them traps heat. Do not run cables under a rug or where they create a trip hazard. If a cable is damaged or feels hot, stop using it and replace it. For fixed wiring, use a qualified electrician.
Common Mistakes
- Fixing a tray before planning the route, then finding the strip is on the wrong side.
- Using screws that are too long, or skipping pilot holes, and splitting or piercing the desktop.
- Overfilling a tray or raceway, so the lid will not close and cables spill out.
- Sticking clips to a dusty surface, then finding they fall off after a few days.
- Pulling cables tight, so moving a monitor strains the plug or socket.
- Hiding the strip where you cannot reach the switch, or covering a warm adapter.
- Drilling a grommet hole in the wrong place, without checking what is underneath.
Cost-Conscious Alternatives
You do not need the most expensive tray. A simple mesh tray, basic raceway, or set of clips will cover most setups. Buy after measuring and counting cables. On a tight budget, start with clips and a short raceway, and add a tray later. Reusable ties are better than single-use ties. Avoid unbranded adhesive products with no weight rating: a clip that falls off is no saving.
Frequently Asked Questions
Can I screw a cable tray into any wooden desk?
Most solid wood, MDF, chipboard, and laminate desks can take short screws underneath, if you measure the thickness, drill pilot holes, and keep fixings away from edges. If your desk is very thin, rented, or valuable, use an adhesive or clamp-on option instead.
Will adhesive clips damage a wooden desk?
They can, especially on veneer. A strong adhesive may lift a thin veneer layer or leave a mark when removed. Test on a hidden area, use the lowest-strength pad that will hold the load, and avoid warm or polished surfaces.
Good cable management for a wooden desk is about matching the fixing to the material, planning the route before you drill, and leaving a way to change it later. A screw-mounted tray carries the most weight, while adhesive channels and clamp-on trays suit desks you cannot drill. Measure the desktop, drill pilot holes, keep adapters ventilated, and leave a little slack.